49 T034 1A0
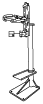
Coil spring compressor set
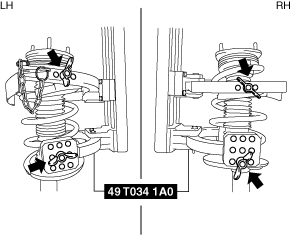
FRONT SHOCK ABSORBER AND COIL SPRING DISASSEMBLY/ASSEMBLY
id021300121900
Special Service Tool (SST)
|
49 T034 1A0
Coil spring compressor set
|
|
1. Remove the wheel and tire. (See WHEEL AND TIRE REMOVAL/INSTALLATION.)
2. Remove the front shock absorber and coil spring. (See FRONT SHOCK ABSORBER AND COIL SPRING REMOVAL/INSTALLATION.)
3. Remove in the order indicated in the table.
4. Install in the reverse order of removal.
5. After replacing any of the following parts, inspect the wheel alignment and adjust it if necessary. (See FRONT WHEEL ALIGNMENT.)
ac9wzw00005576
|
|
1
|
Cap
|
|
2
|
Piston rod nut
(See Piston Rod Nut Removal Note.)
|
|
3
|
Front shock absorber assembly
|
|
4
|
Mounting rubber
|
|
5
|
Bearing
|
|
6
|
Coil spring
|
|
7
|
Dust boot
|
|
8
|
Bound stopper
|
|
9
|
Lower spring seat
|
|
10
|
Front shock absorber
|
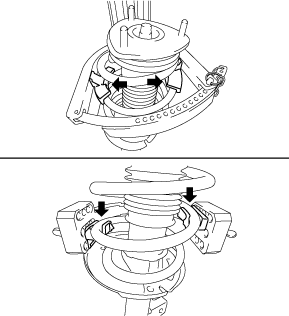
Piston Rod Nut Removal Note
1. Install the front shock absorber and coil spring to the SST according to the following procedures.
ac9uuw00007923
|
ac9uuw00007924
|
2. Compress the coil spring using the SST.
3. Remove the piston rod nut.
Coil Spring Installation Note
1. Compress the coil spring using the SST.
ac5uuw00000123
|
2. Install the front shock absorber so that the lower end of the coil spring is seated on the step of the lower spring seat.
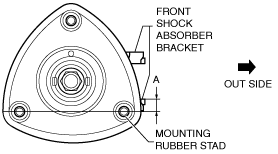
Mounting Rubber Installation Note
1. Install the mounting rubber so that the mounting rubber stud and the front shock absorber bracket are in position A shown in the following figure.
ac5uuw00000124
|