 |
ac4ccw00000641
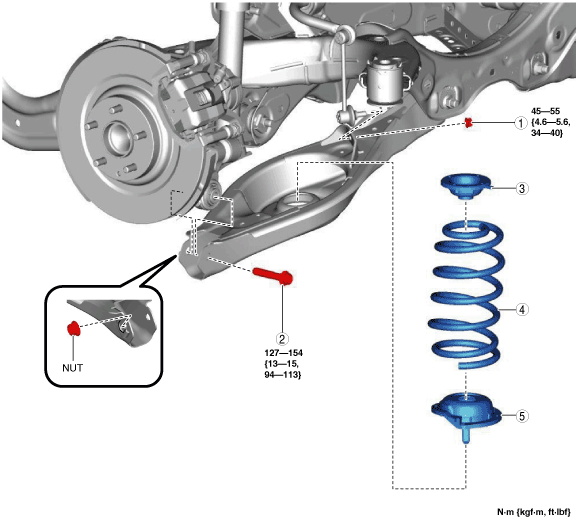
REAR COIL SPRING REMOVAL/INSTALLATION
id021400800700
1. Remove the wheel and tire. (See WHEEL AND TIRE REMOVAL/INSTALLATION.)
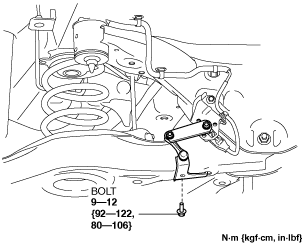
2. When working on the left side of the vehicle, disconnect the auto leveling sensor link. (With auto leveling sensor)
ac4ccw00000641
|
3. Remove in the order indicated in the table.
4. Install in the reverse order of removal. (See Suspension Links Installation Note.)
5. Perform the headlight auto leveling system initial setting. (With auto leveling sensor) (See HEADLIGHT AUTO LEVELING SYSTEM INITIALIZATION.)
ac9uuw00007964
|
|
1
|
Rear stabilizer control link lower side nut
|
|
2
|
Rear lower arm outer bolt
|
|
3
|
Upper spring seat rubber
|
|
4
|
Rear coil spring
|
|
5
|
Lower spring seat rubber
|
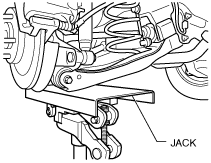
Rear Coil Spring Removal Note
1. Support the rear lower arm using a jack.
ac5wzw00002863
|
2. Remove the rear lower arm outer bolt.
3. Remove the rear coil spring.
Suspension Links Installation Note
1. When installing the joint section with a rubber bushing, perform the following procedures.
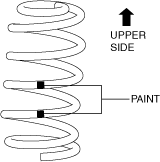
Rear Coil Spring Installation Note
1. Install the rear coil spring as shown in the figure.
ac9wzw00005075
|
2. Align the upper end of the rear coil spring with the upper spring seat rubber.
3. Align the lower end of the rear coil spring with the step of the lower spring seat rubber.
4. Position the jack under the rear lower arm and jack up slowly.
ac5wzw00002863
|
5. Install the rear lower arm outer bolt.