 |
ac9uuw00007986
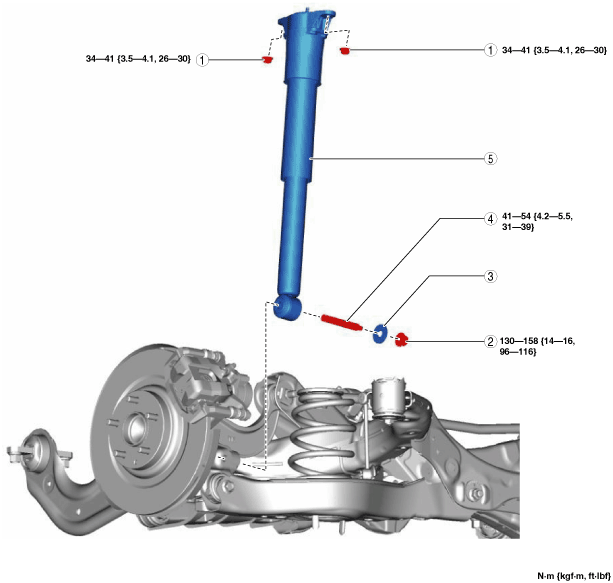
REAR SHOCK ABSORBER REMOVAL/INSTALLATION
id021400801300
1. Remove the wheel and tire. (See WHEEL AND TIRE REMOVAL/INSTALLATION.)
2. Remove in the order indicated in the table.
3. Install in the reverse order of removal. (See Suspension Link Installation Note.)
4. Perform the headlight auto leveling system initial setting. (With auto leveling sensor) (See HEADLIGHT AUTO LEVELING SYSTEM INITIALIZATION.)
ac9uuw00007986
|
|
1
|
Rear shock absorber upper nut
|
|
2
|
Rear shock absorber lower nut
|
|
3
|
Washer
|
|
4
|
Stud bolt
|
|
5
|
Rear shock absorber
|
Suspension Link Installation Note
1. When installing the joint section with a rubber bushing, perform the following procedures.
Rear Shock Absorber Upper Nut Installation Note
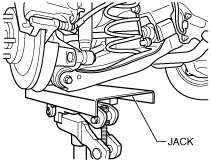
1. Lift up the rear lower arm using a jack and install the rear shock absorber upper nuts.
ac5wzw00002859
|
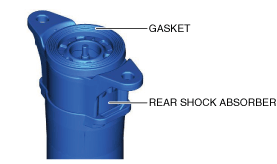
Rear Shock Absorber Installation Note (With Gasket)
1. Verify if the gasket secured to the upper part of the rear shock absorber has come off completely.
ac9wzw00005535
|
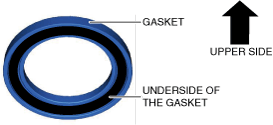
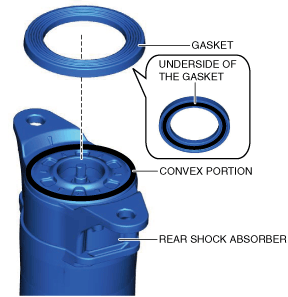
2. If the gasket has come off completely, adhere the gasket to the rear shock absorber using the following procedure.
am6xuw00011471
|
am6xuw00011472
|
3. Install the rear shock absorber.