 |
ac9uuw00005783
FRONT BUMPER REMOVAL
id091000804800
1. Disconnect the negative battery terminal. (See NEGATIVE BATTERY TERMINAL DISCONNECTION/CONNECTION.)
2. Remove the seal board upper. (See SEAL BOARD UPPER REMOVAL/INSTALLATION.)
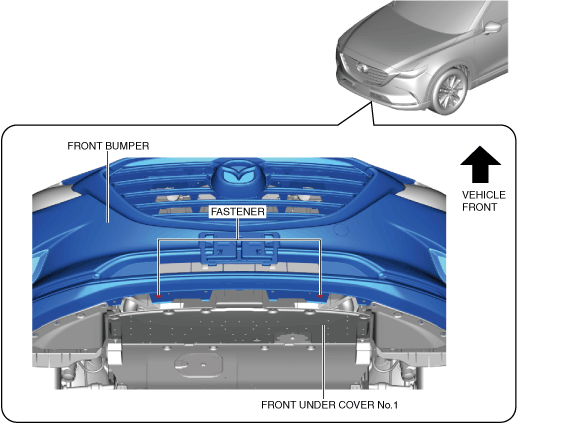
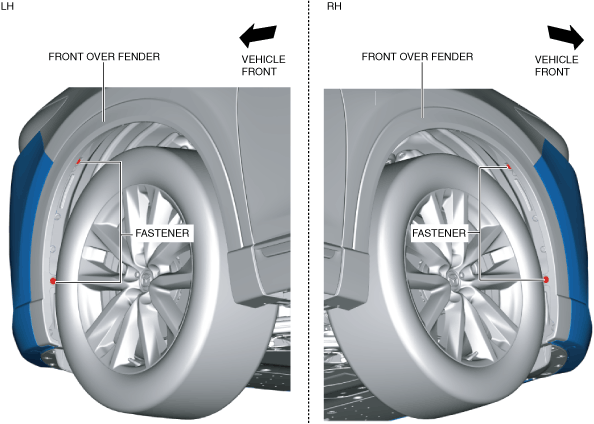
3. Remove the fasteners.
ac9uuw00005783
|
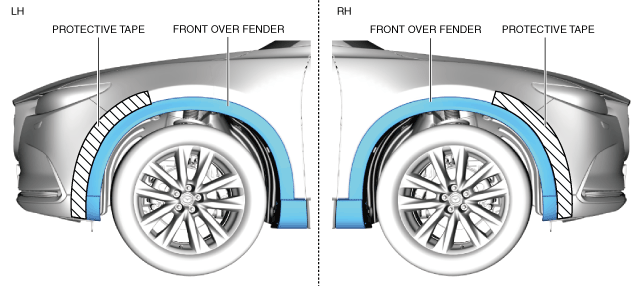
4. Affix the protective tape to the position shown in the figure to prevent scratches and damage.
ac9uuw00005784
|
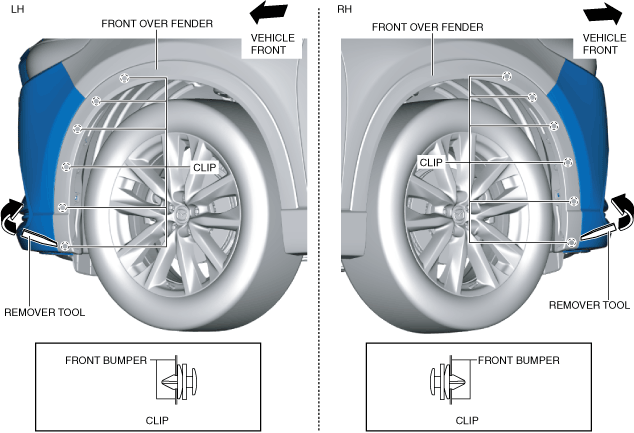
5. Move the remover tool in the direction of the arrow shown in the figure and detach the front over fender clips from the front bumper starting from the vehicle front.
ac9wzw00004840
|
6. Affix the protective tape to the position shown in the figure to prevent scratches and damage.
ac9uuw00005786
|
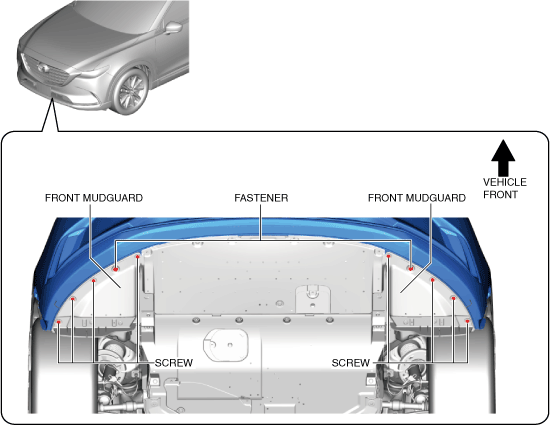
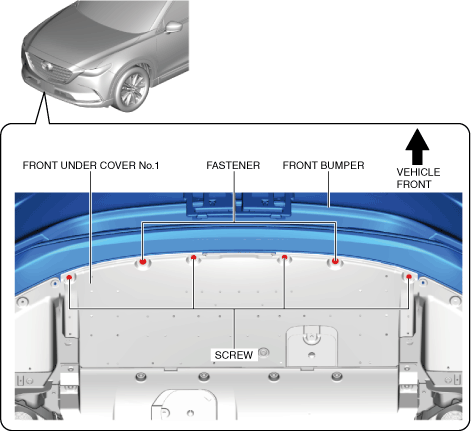
7. Remove the screws and fasteners.
ac9uuw00005787
|
8. Remove the fasteners.
ac9uuw00005788
|
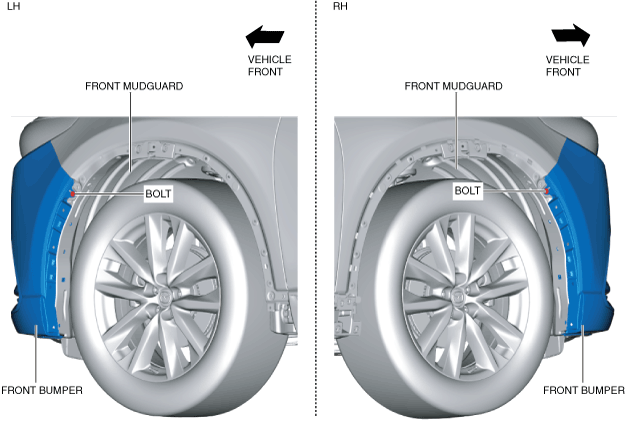
9. Slightly bend back the front over fender and remove the bolts.
ac9uuw00005789
|
10. Remove the screws and fasteners.
ac9uuw00005790
|
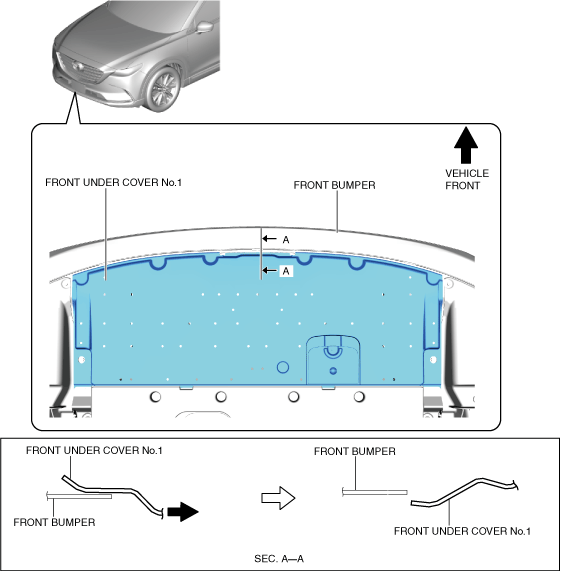
11. Move the front under cover No.1 guide in the direction of the arrow shown in the figure and insert it into the inner side of the front bumper.
ac9uuw00005791
|
12. Remove the fasteners.
ac9wzw00004841
|
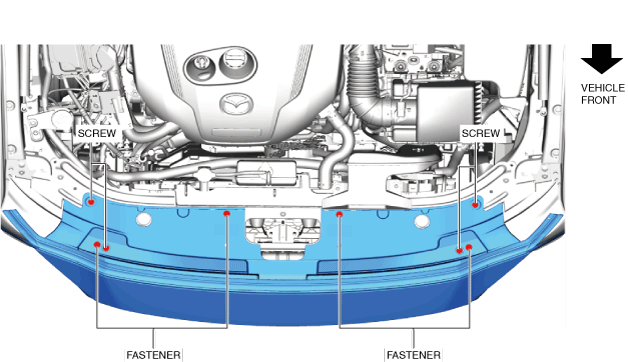
13. Remove the screws and fasteners.
ac9uuw00005793
|
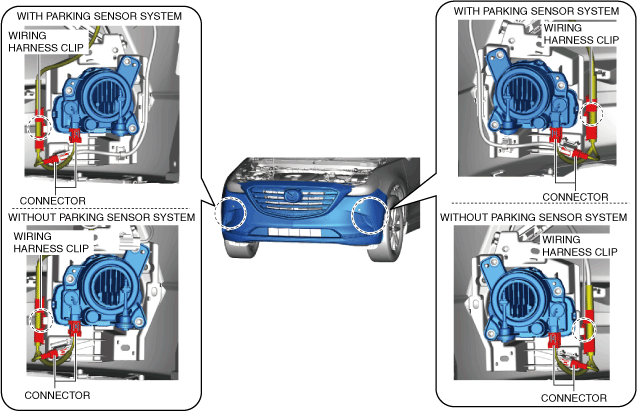
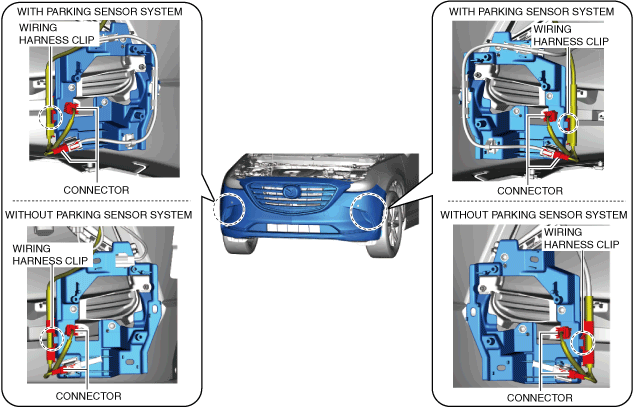
14. Disconnect the connectors.
With front fog light
ac9wzw00003918
|
Without front fog light
ac9wzw00003919
|
15. Remove the wiring harness clips.
16. Detach the front bumper from the front bumper sliders while removing the hooks in the order of the arrows shown in the figure.
ac9wzw00005610
|
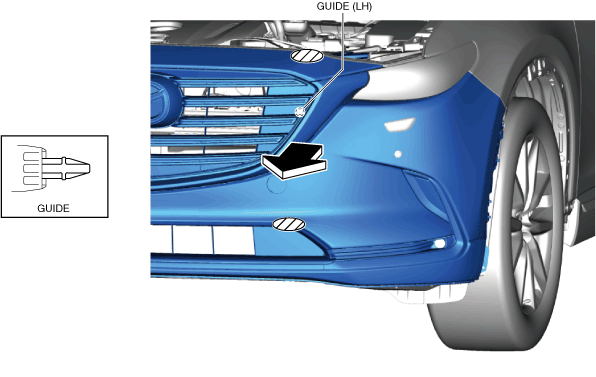
17. Hold the shaded areas shown in the figure and pull the front bumper in the direction of the arrow to pull out the guide (LH) from the shroud panel.
ac9uuw00005796
|
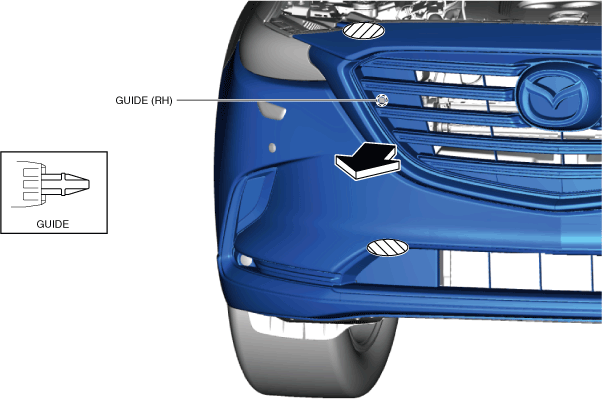
18. Hold the shaded areas shown in the figure and pull the front bumper in the direction of the arrow to pull out the guide (RH) from the shroud panel.
ac9uuw00005797
|
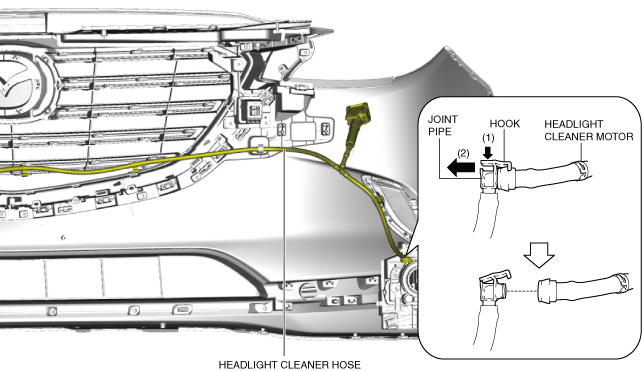
19. While pressing the hook of the joint pipe in the direction of arrow (1) shown in the figure, pull the joint pipe in the direction of arrow (2) to disconnect the joint pipe from headlight cleaner motor. (With headlight cleaner system)
ac9wzw00003920
|
20. Remove the front bumper.