 |
ac9uuw00006874
SIDE GARNISH REMOVAL/INSTALLATION
id091600400000
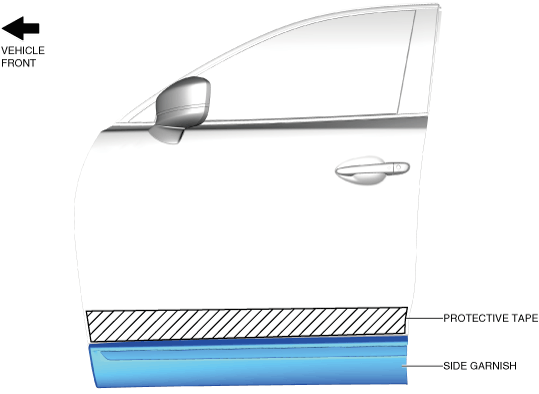
Front Side
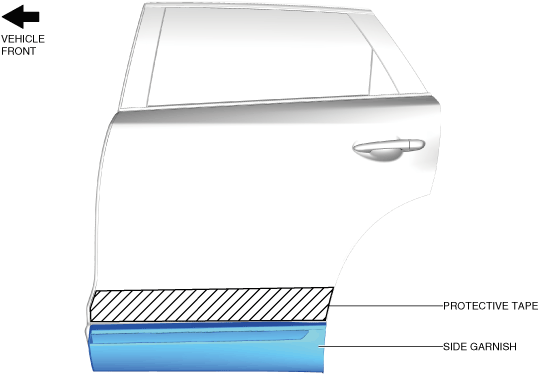
1. Affix the protective tape to the position shown in the figure to prevent scratches and damage.
ac9uuw00006874
|
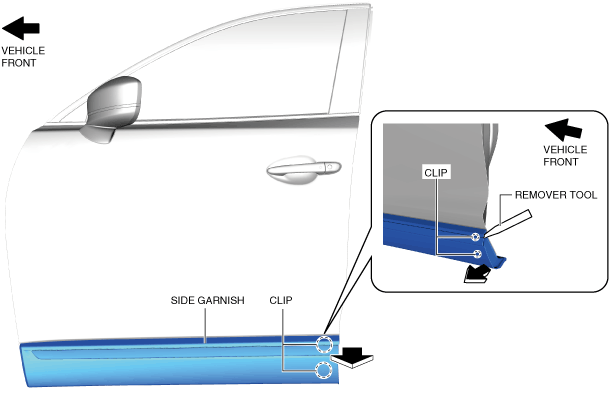
2. Open the front door.
3. Insert the remover tool in the position shown in the figure.
ac9uuw00006875
|
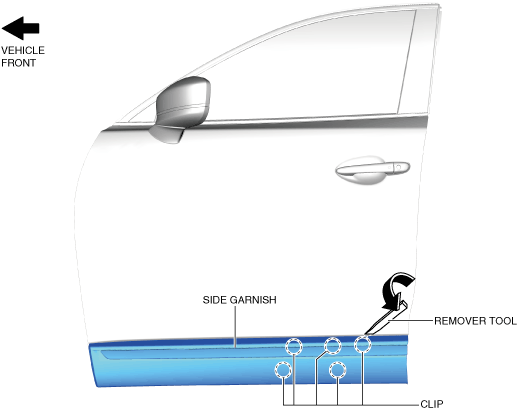
4. Pull the side garnish in the direction of the arrow shown in the figure and detach the clips from the front door.
5. Insert a remover tool into the position shown in the figure, move it in the direction of the arrow and detach the side garnish clips.
ac9uuw00006876
|
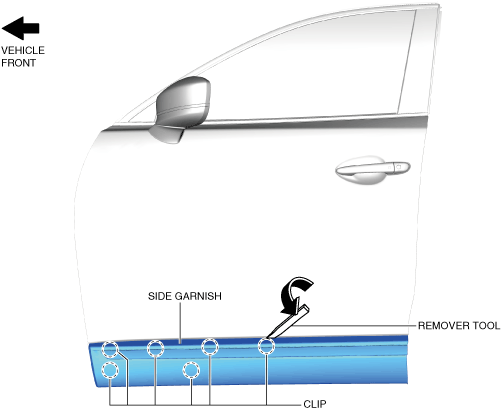
6. Close the front door.
7. Insert a remover tool into the position shown in the figure, move it in the direction of the arrow and detach the side garnish clips.
ac9uuw00006877
|
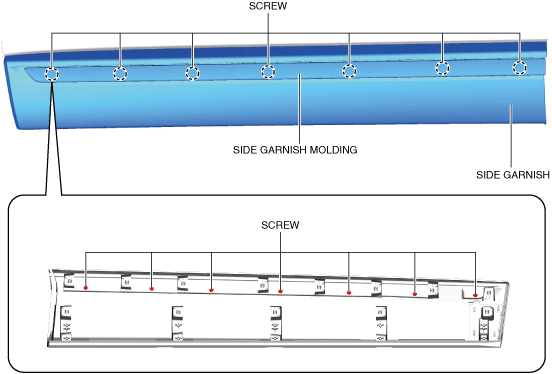
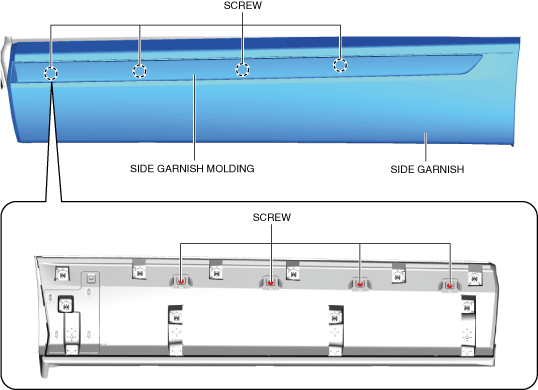
8. Remove the side garnish.
9. Remove the screws.
ac9wzw00004459
|
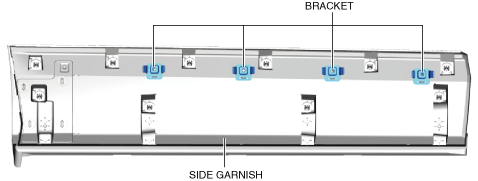
10. Remove the bracket.
11. Remove the screws. (With side garnish molding)
ac9uuw00006879
|
12. Remove the side garnish molding. (With side garnish molding)
13. Install in the reverse order of removal.
Rear Side
1. Affix the protective tape to the position shown in the figure to prevent scratches and damage.
ac9uuw00006880
|
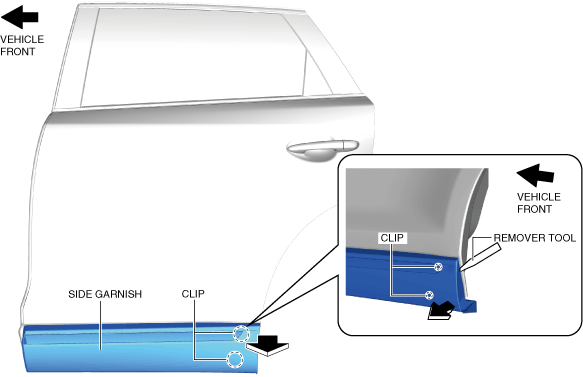
2. Open the rear door.
3. Insert the remover tool in the position shown in the figure.
ac9uuw00006881
|
4. Pull the side garnish in the direction of the arrow shown in the figure and detach the clips from the rear door.
5. Insert a remover tool into the position shown in the figure, move it in the direction of the arrow and detach the side garnish clips.
ac9uuw00006882
|
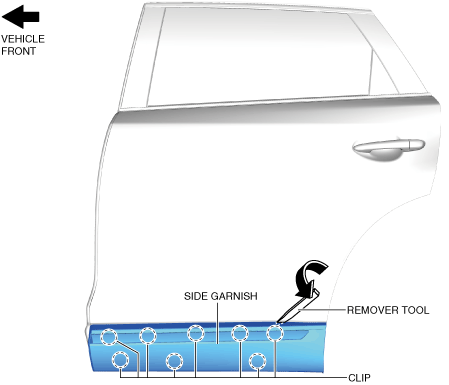
6. Remove the side garnish.
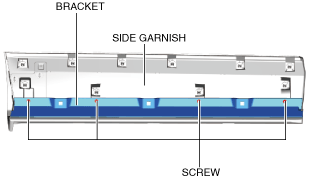
7. Remove the screws.
ac9wzw00004460
|
8. Remove the bracket.
9. Remove the screws. (With side garnish molding)
ac9wzw00003954
|
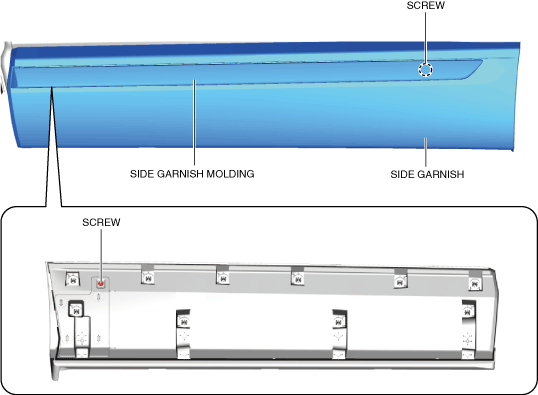
10. Remove the brackets. (With side garnish molding)
ac9wzw00003955
|
11. Remove the screw. (With side garnish molding)
ac9wzw00003956
|
12. Remove the side garnish molding. (With side garnish molding)
13. Install in the reverse order of removal.