 |
ac9wzw00004461
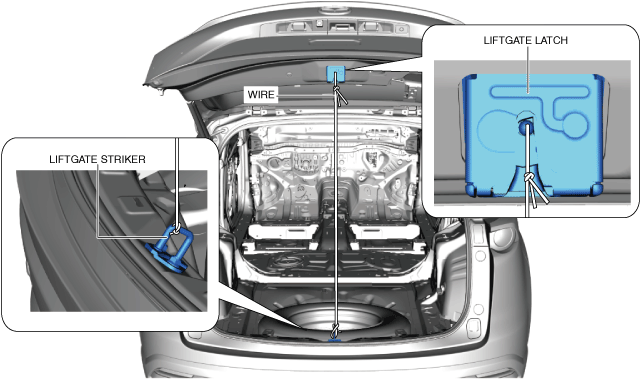
LIFTGATE GARNISH REMOVAL/INSTALLATION
id091600445800
1. Attach a piece of wire between the liftgate striker and liftgate latch to hold the liftgate in the half-opened position as shown below.
ac9wzw00004461
|
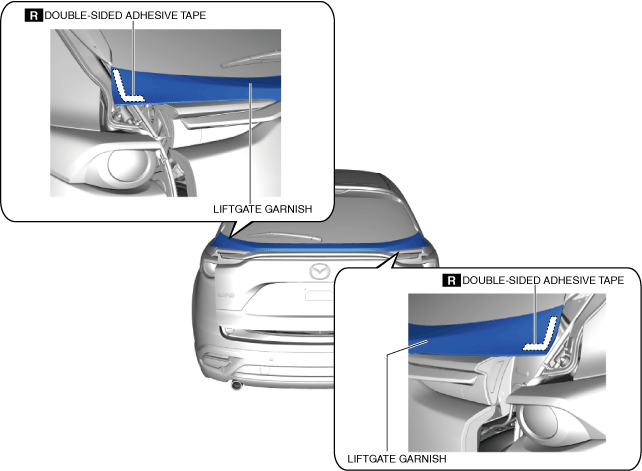
2. Peeling off the double-sided adhesive tape shown in the figure using a utility knife.
ac9uuw00006962
|
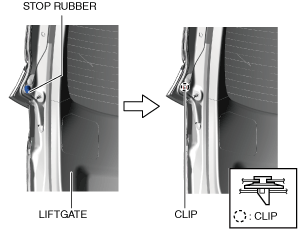
3. Remove the stop rubber.
ac9uuw00011771
|
4. Verify the clip securing the liftgate garnish from the stop rubber installation hole.
5. Insert a round bar into the stop rubber installation hole and press up the clip.
6. With the other hand, lightly pull up the end of the liftgate garnish to disengage the clip tabs from the liftgate.
7. Perform the same work on the other side to disengage the clips from liftgate on both ends.
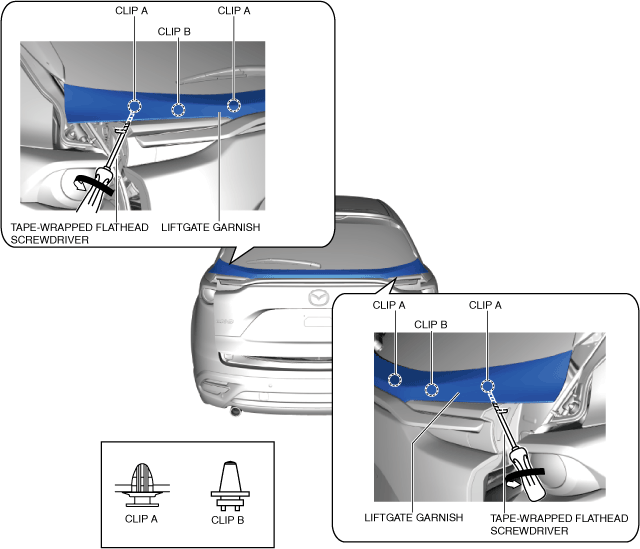
8. Insert a tape-wrapped flathead screwdriver into the position shown in the figure, rotate it in the direction of the arrows and detach liftgate garnish clips A and B.
ac9uuw00011772
|
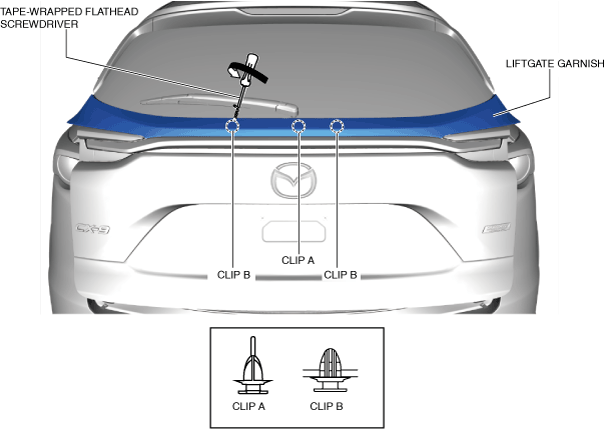
9. Affix rag using tape to the position shown in the figure.
ac9uuw00006964
|
10. Insert a tape-wrapped flathead screwdriver into the position shown in the figure, rotate it in the direction of the arrow and detach the liftgate garnish clips A and B.
ac9uuw00006965
|
11. Remove the liftgate garnish.
12. Install in the reverse order removal.