 |
ac9wzw00003353
REAR SCUFF PLATE REMOVAL/INSTALLATION
id091700604100
Removal
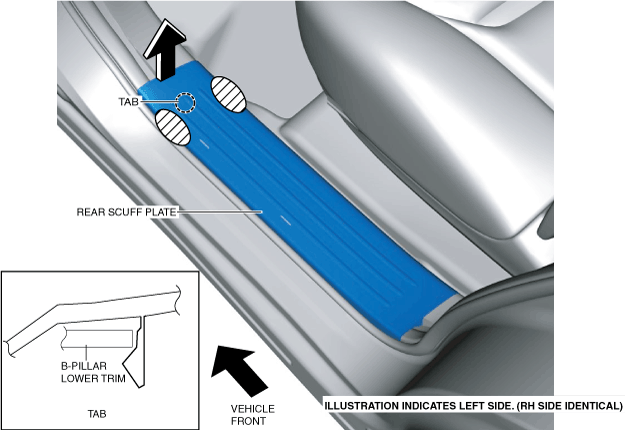
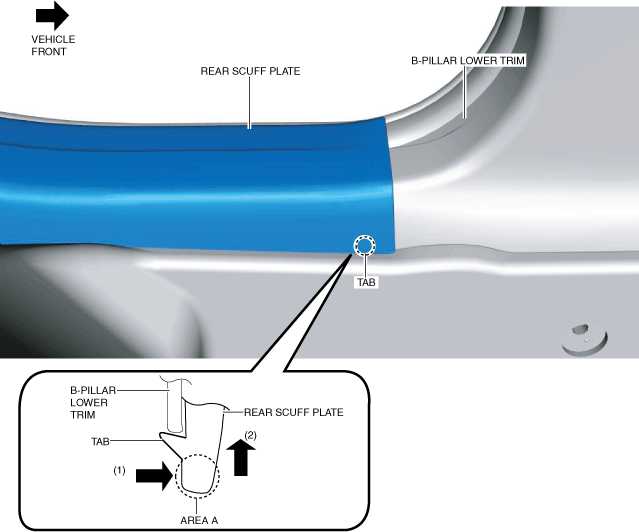
1. Hold area A shown in the figure, open the rear scuff plate in the direction of arrow (1), move it in the direction of arrow (2), and detach the tab of the rear scuff plate from the B-pillar lower trim.
ac9wzw00003353
|
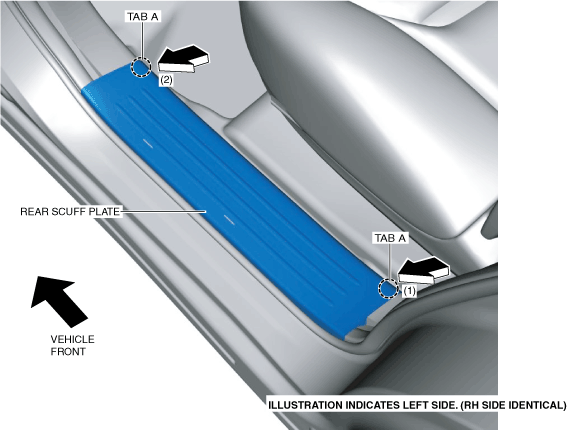
2. Hold the shaded areas shown in the figure, move the rear scuff plate in the direction of the arrow, and detach the tab of the rear scuff plate from the B-pillar lower trim.
ac9wzw00003354
|
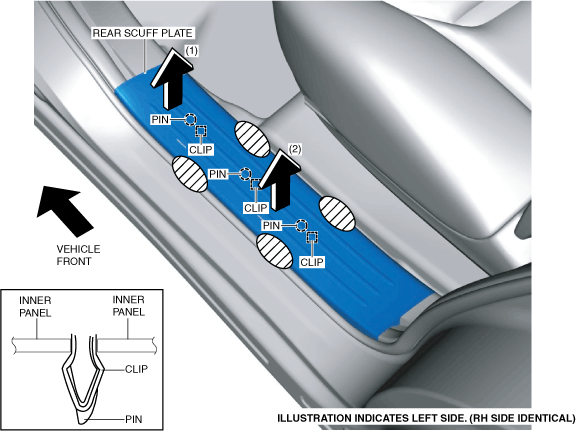
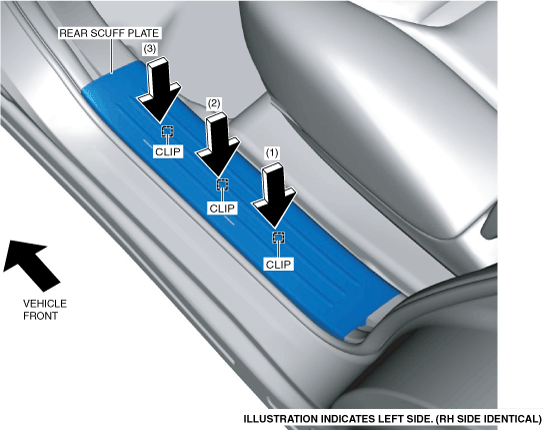
3. Hold the shaded areas shown in the figure, move the rear scuff plate in the direction of the arrows in the order of (1), (2) and remove it while detaching the clips from the inner panel, and pull out the pins.
ac9wzw00004792
|
4. Hold area A shown in the figure, open the rear scuff plate in the direction of arrow (1), move it in the direction of arrow (2), and detach tab A of the rear scuff plate from the trunk side trim.
ac9wzw00004793
|
5. Hold the shaded areas shown in the figure, move the rear scuff plate in the direction of arrow (3), and detach tab B of the rear scuff plate from the trunk side trim.
Installation
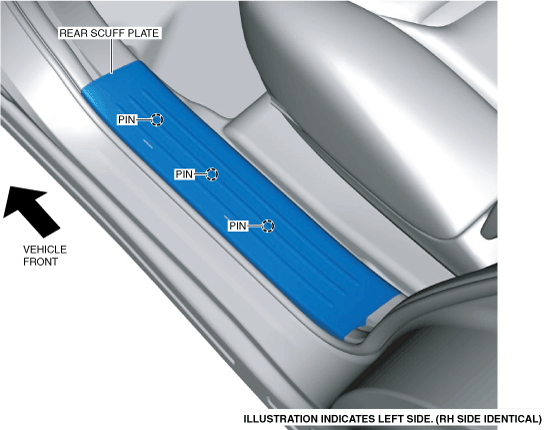
1. Align the rear scuff plate pins shown in the figure with the inner panel.
ac9wzw00003597
|
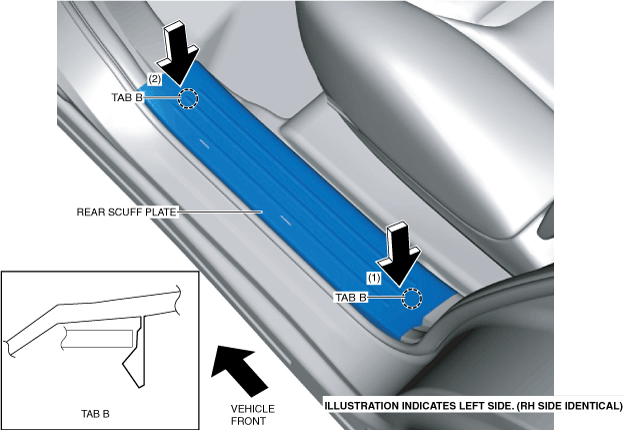
2. Press the rear scuff plate in the direction of arrow (1) shown in the figure and install tab B to the trunk side trim.
ac9wzw00003598
|
3. Press the rear scuff plate in the direction of arrow (2) shown in the figure and install tab B to the B-pillar lower trim.
4. Press the rear scuff plate in the direction of arrow (1) shown in the figure and install the clip to the inner panel.
ac9wzw00004285
|
5. Press the rear scuff plate in the direction of arrow (2) shown in the figure and install the clip to the inner panel.
6. Press the rear scuff plate in the direction of arrow (3) shown in the figure and install the clip to the inner panel.
7. Press the rear scuff plate in the direction of arrow (1) shown in the figure and install tab A to the trunk side trim.
ac9wzw00003600
|
8. Press the rear scuff plate in the direction of arrow (2) shown in the figure and install tab A to the B-pillar lower trim.