 |
ac9uuw00007229
FRONT MAP LIGHT BULB REMOVAL/INSTALLATION
id091800903000
Type A
1. Disconnect the negative battery terminal. (See NEGATIVE BATTERY TERMINAL DISCONNECTION/CONNECTION.)
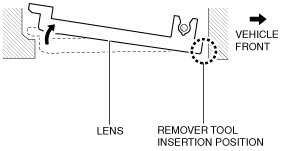
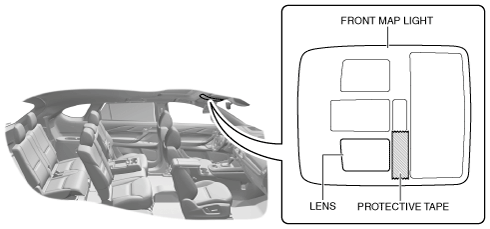
2. To prevent scratches, apply protective tape to the position shown in the figure.
ac9uuw00007229
|
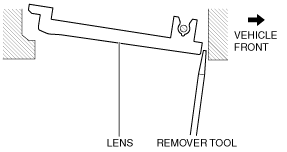
3. Press the lens to assure a space for inserting the remover tool.
ac9wzw00003477
|
4. Insert the remover tool into the gap between the lens and the front map light.
ac9wzw00003478
|
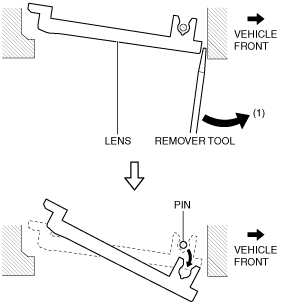
5. Move the remover tool in the direction of arrow (1) shown in the figure, pull out the lens from the pin.
ac9wzw00003479
|
6. Remove the lens from the front map light.
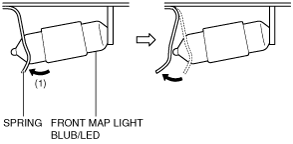
7. Press the spring of the front map light in the direction of arrow (1) shown in the figure and disengage the front map light bulb/LED from the spring.
ac9wzw00003480
|
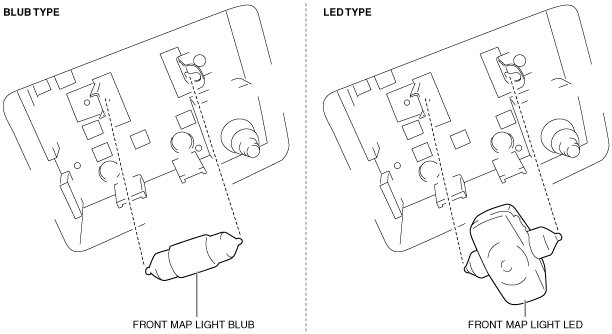
8. Remove the front map light bulb/LED.
ac9wzw00003481
|
9. Install in the reverse order of removal.
Type B