 |
ac9wzw00004778
DECORATION PANEL REMOVAL/INSTALLATION
id091700600800
Driver-side
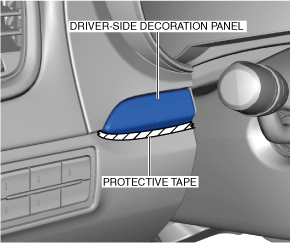
1. Affix protective tape to the position shown in the figure.
ac9wzw00004778
|
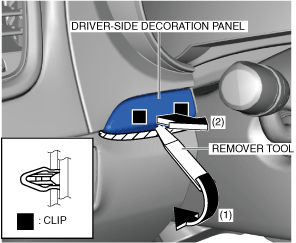
2. Insert a remover tool in the position indicated by arrow (1) shown in the figure and detach clips.
ac9wzw00004779
|
3. Remove the driver-side decoration panel in the direction of arrow (2) shown in the figure.
4. Install in the reverse order of removal.
Passenger-side
1. Disconnect the negative battery terminal. (See NEGATIVE BATTERY TERMINAL DISCONNECTION/CONNECTION.)
2. Remove the glove compartment. (See GLOVE COMPARTMENT REMOVAL/INSTALLATION.)
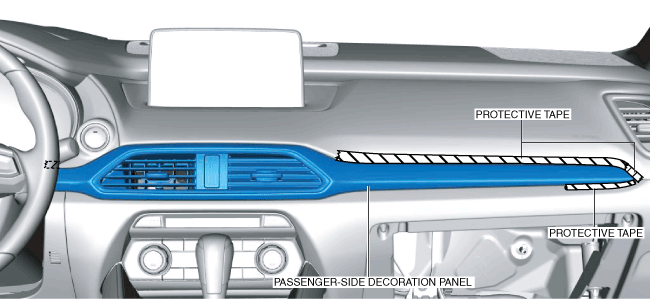
3. Affix protective tape to the position shown in the figure.
ac9uuw00008846
|
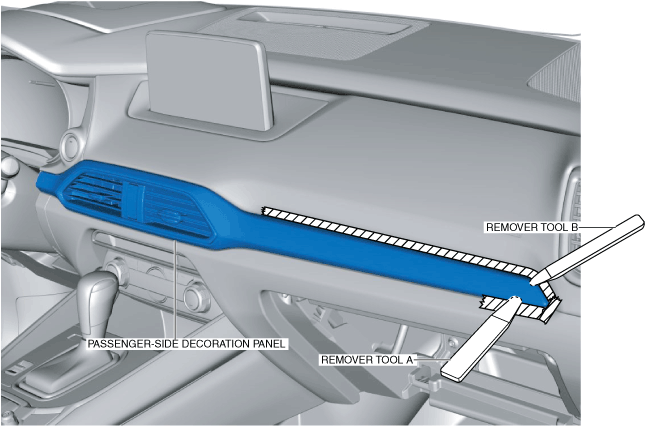
4. Insert remover tool A and remover tool B into the positions shown in the figure.
ac9uuw00008847
|
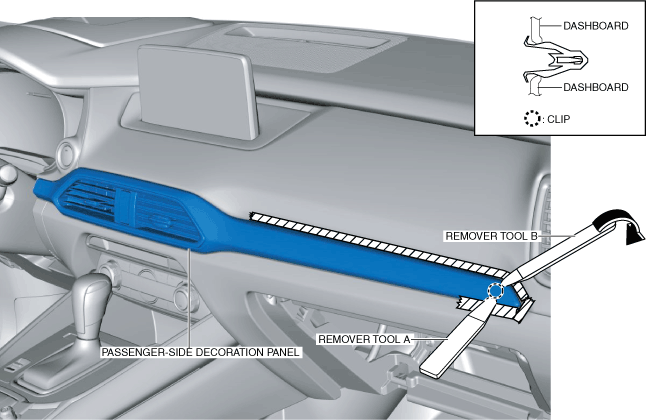
5. With remover tool A inserted, move remover tool B in the direction of the arrow shown in the figure, and detach the clip from the dashboard.
ac9uuw00008848
|
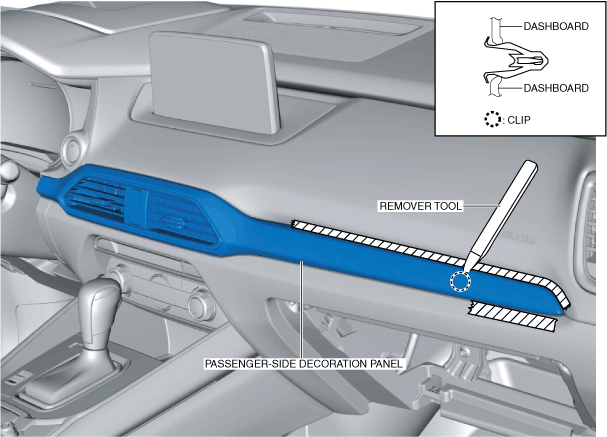
6. Insert the remover tool into the position shown in the figure.
ac9wzw00005377
|
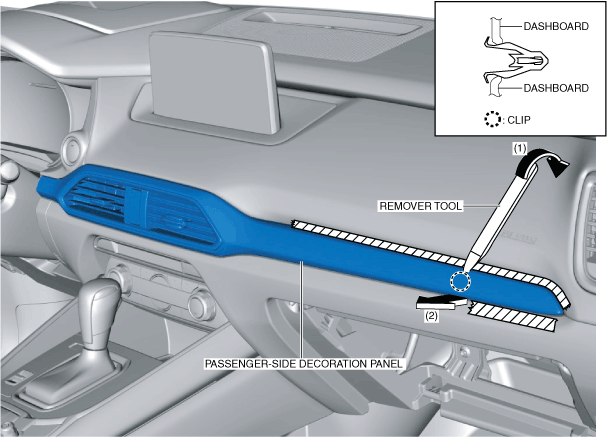
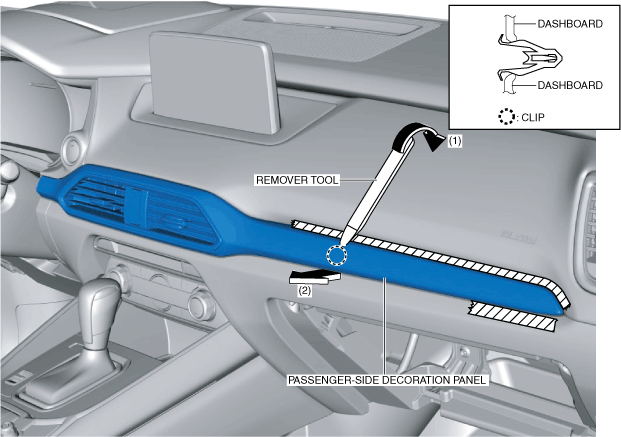
7. While moving the remover tool in the direction of arrow (1) shown in the figure, move the passenger-side decoration panel in the direction of arrow (2) and detach the clip from the dashboard.
ac9uuw00008849
|
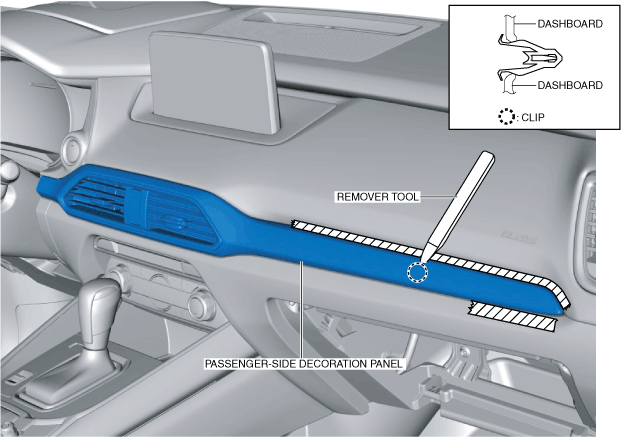
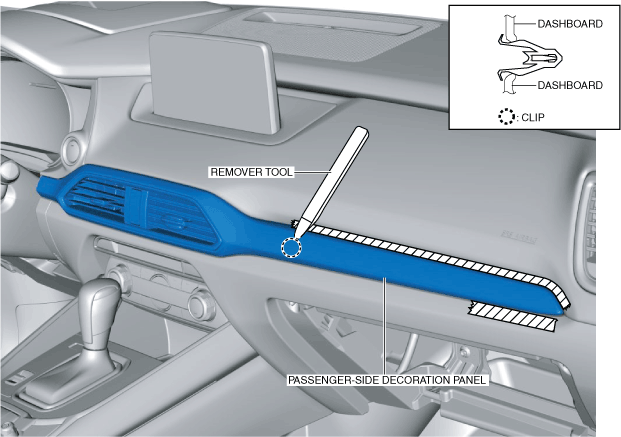
8. Insert the remover tool into the position shown in the figure.
ac9wzw00004902
|
9. While moving the remover tool in the direction of arrow (1) shown in the figure, move the passenger-side decoration panel in the direction of arrow (2) and detach the clip from the dashboard.
ac9uuw00008850
|
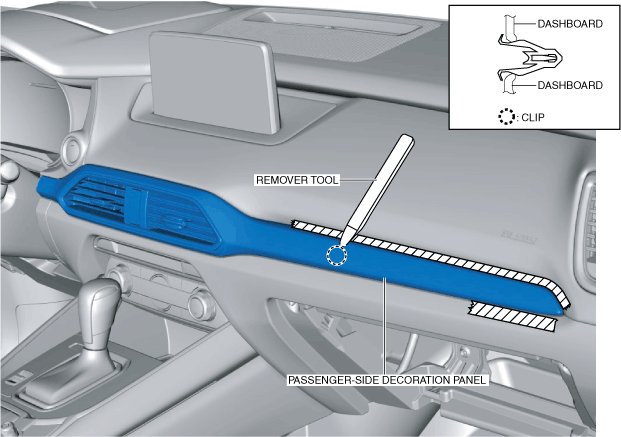
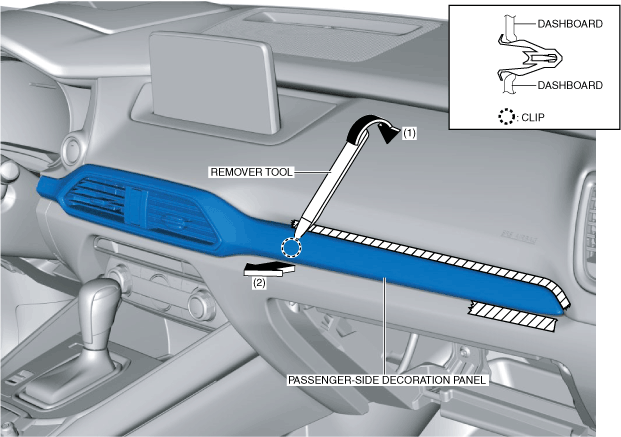
10. Insert the remover tool into the position shown in the figure.
ac9wzw00004903
|
11. While moving the remover tool in the direction of arrow (1) shown in the figure, move the passenger-side decoration panel in the direction of arrow (2) and detach the clip from the dashboard.
ac9uuw00008851
|
12. Insert the remover tool into the position shown in the figure.
ac9wzw00005378
|
13. While moving the remover tool in the direction of arrow (1) shown in the figure, move the passenger-side decoration panel in the direction of arrow (2) and detach the clip from the dashboard.
ac9uuw00008852
|
14. Move the passenger-side decoration panel in the order of arrows (1), (2), (3), and (4) shown in the figure, and detach clips A and clips B.
ac9uuw00008853
|
15. Disconnect the hazard warning switch connector.
16. Remove the decoration panel.
17. Install in the reverse order of removal.