 |
ac9wzw00005332
OUTER MIRROR GARNISH REMOVAL/INSTALLATION
id091200003000
Removal
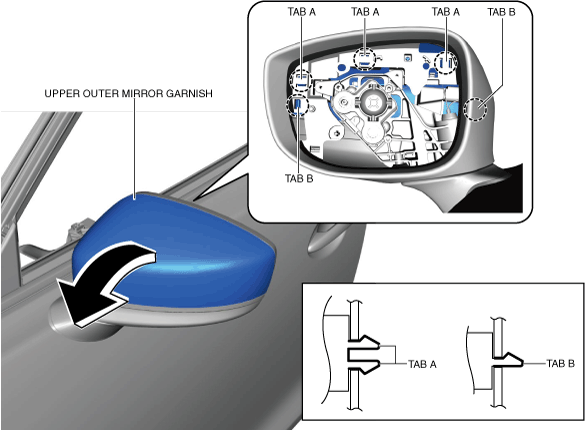
Upper outer mirror garnish
1. Disconnect the negative battery terminal. (See NEGATIVE BATTERY TERMINAL DISCONNECTION/CONNECTION.)
2. Remove the outer mirror glass. (See OUTER MIRROR GLASS REMOVAL.)
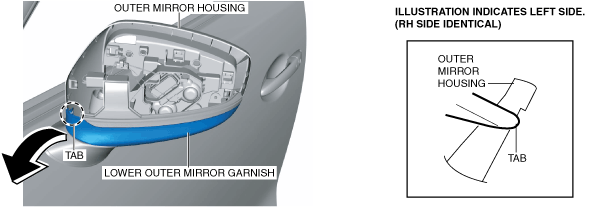
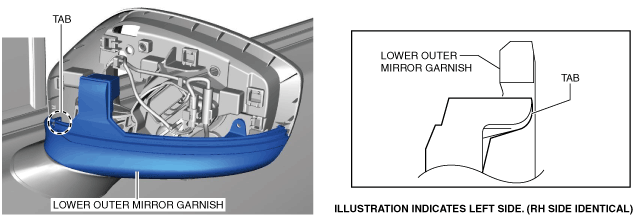
3. Insert a tape-wrapped flathead screwdriver into the upper outer mirror garnish and remove tabs A and tab B in the direction of arrow.
ac9wzw00005332
|
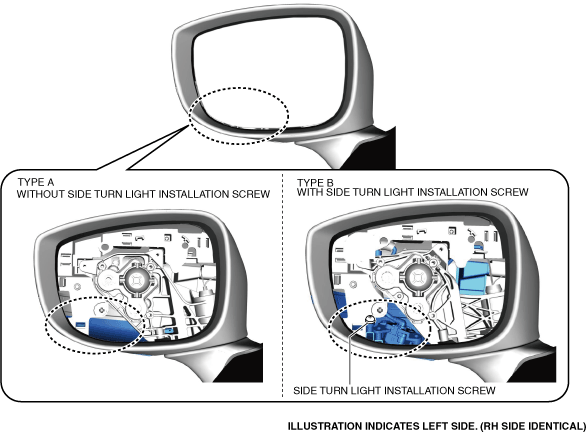
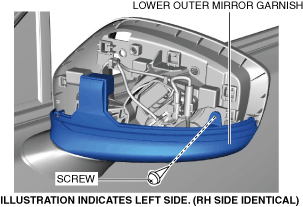
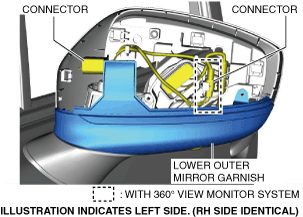
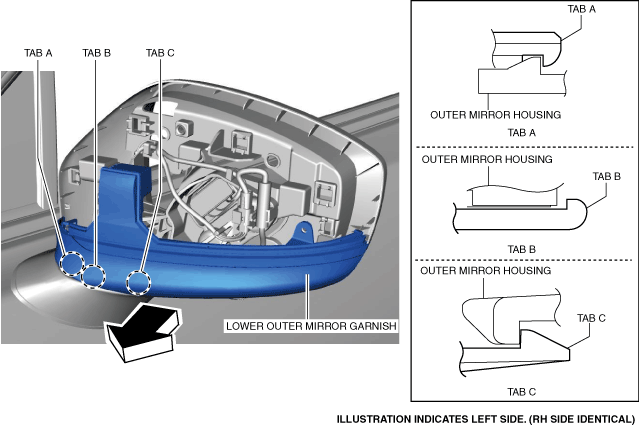
Lower outer mirror garnish
ac9uuw00007342
|
ac9wzw00005333
|
ac9uuw00007345
|
ac9uuw00007347
|
ac9uuw00007348
|
ac9wzw00005334
|
ac9wzw00005335
|
Installation
Upper outer mirror garnish
1. Press the outer mirror garnish in the direction of the arrow shown in the figure and install tabs A and B.
ac9wzw00004880
|
2. Install the outer mirror glass. (See OUTER MIRROR GLASS INSTALLATION.)
3. Connect the negative battery terminal. (See NEGATIVE BATTERY TERMINAL DISCONNECTION/CONNECTION.)
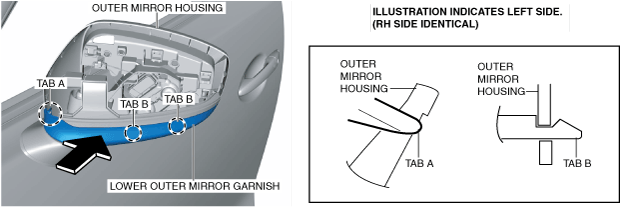
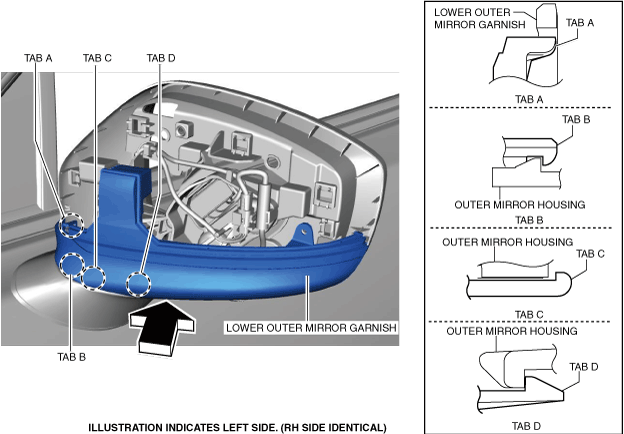
Lower outer mirror garnish
ac9uuw00007346
|
ac9wzw00005336
|
ac9uuw00007348
|
ac9uuw00007347
|