 |
ac9uuw00006905
REAR SASH MOLDING INSTALLATION
id091600807100
1. Remove any grease or dirt from the adhesion surface of the rear door.
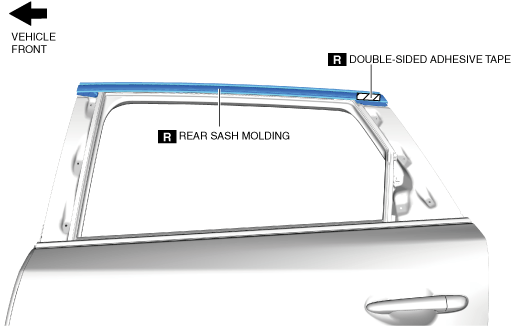
2. Peel off the backing of the double-sided adhesive tape.
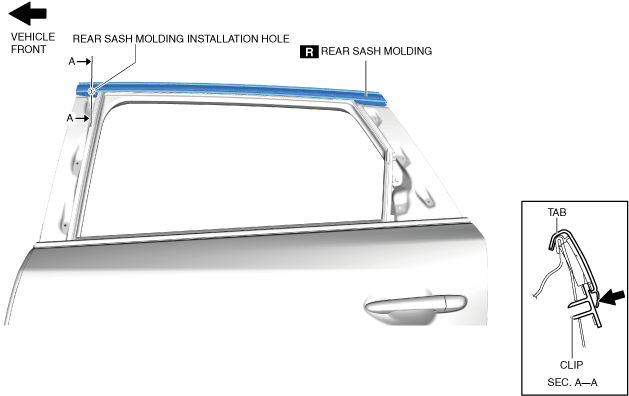
3. After aligning the rear sash molding clip to the rear sash molding installation hole, hook the rear sash molding tab to the rear door.
ac9uuw00006905
|
4. Press in the rear sash molding in the direction of the arrow shown in the figure and attach the rear sash molding clip to the rear door.
ac9uuw00006906
|
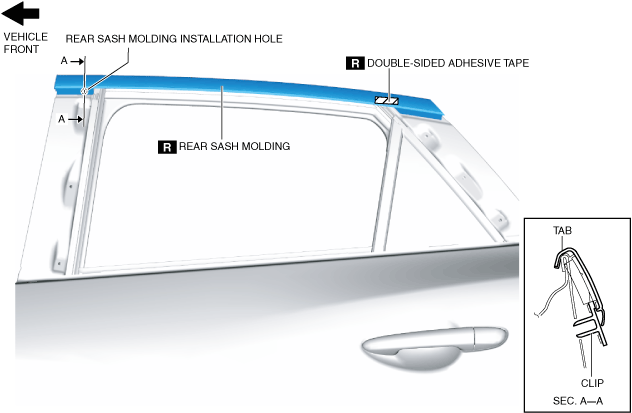
5. Press in the rear sash molding in the direction of the arrow shown in the figure and attach the rear sash molding tab to the rear door.
ac9wzw00004771
|
6. Press the rear sash molding to adhere the double-sided adhesive tape to the rear sash molding installation area.
ac9wzw00004772
|
7. Install the following parts: