 |
ac9wzw00003812
CAPACITOR (i-ELOOP) REMOVAL/INSTALLATION [i-ELOOP]
id131704006000
Procedure Before i-ELOOP-Related Part Servicing
Cautions On Handling Capacitor (i-ELOOP)
Capacitor (i-ELOOP) Removal/Installation
1. Disconnect the negative battery terminal. (See NEGATIVE BATTERY TERMINAL DISCONNECTION/CONNECTION.)
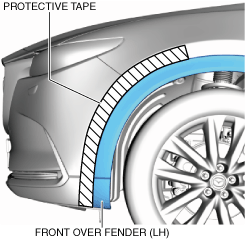
2. Affix the protective tape to the position shown in the figure to prevent scratches and damage.
ac9wzw00003812
|
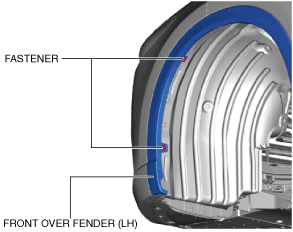
3. Remove the fasteners.
ac9wzw00003813
|
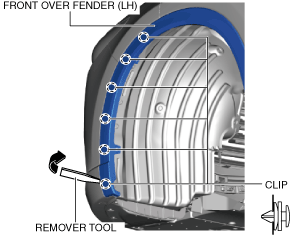
4. Move the remover tool in the direction of the arrow shown in the figure and detach the front over fender clips from the front bumper starting from the vehicle front.
ac9wzw00003814
|
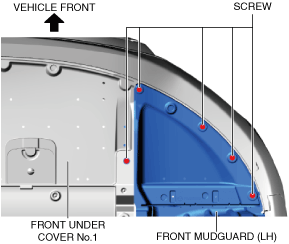
5. Remove the fasteners.
ac9wzw00003815
|
6. Remove the screws shown in the figure.
ac9wzw00003816
|
7. Disconnect the service plug. (See SERVICE PLUG DISCONNECTION/CONNECTION [i-ELOOP].)
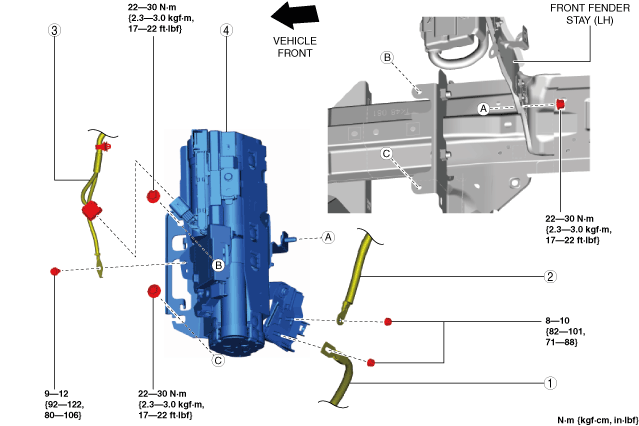
8. Remove in the order indicated in the table.
9. Install in the reverse order of removal.
10. When disposing of the capacitor (i-ELOOP), perform compulsory discharge of the capacitor before disposal. (See CAPACITOR (i-ELOOP) COMPULSORY DISCHARGE [i-ELOOP].)
11. If the capacitor is replaced with a new one, charge the new capacitor. (See CAPACITOR (i-ELOOP) RECHARGING [i-ELOOP].)
ac9wzw00003817
|
|
1
|
Engine wiring harness
|
|
2
|
Battery cable
|
|
3
|
Capacitor (i-ELOOP) connector, front wiring harness
|
|
4
|
Capacitor (i-ELOOP)
|
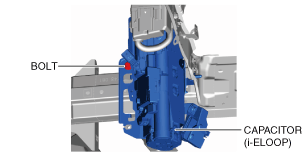
Capacitor (i-ELOOP) installation note
1. Set the capacitor (i-ELOOP) to the installation position.
2. Temporarily tighten the bolt shown in the figure.
ac9wzw00003818
|
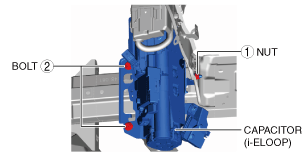
3. Tighten the nut and bolts in the order shown in the figure.
ac9wzw00003819
|