 |
ac9uuw00009373
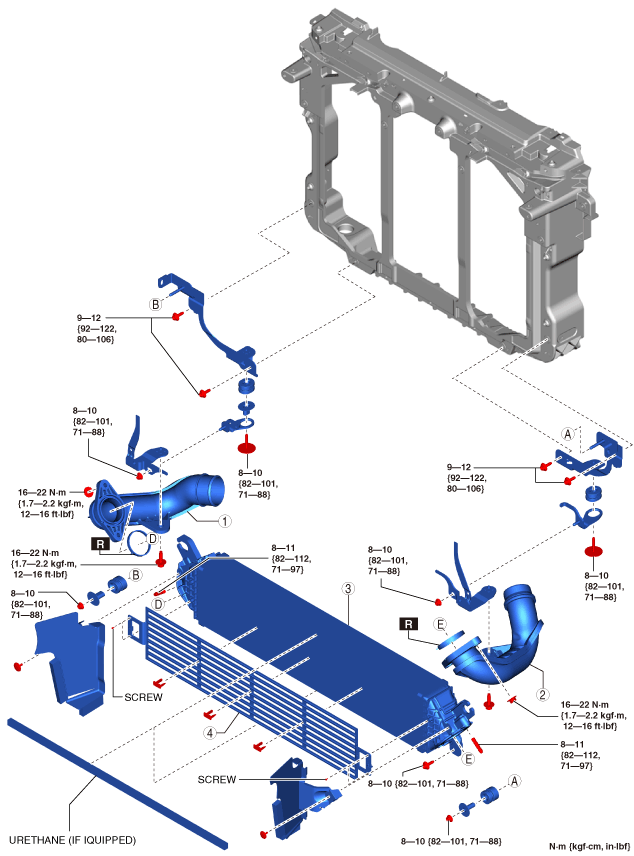
CHARGE AIR COOLER REMOVAL/INSTALLATION [SKYACTIV-G 2.5T]
id0113q4705900
1. Disconnect the negative battery terminal. (See NEGATIVE BATTERY TERMINAL DISCONNECTION/CONNECTION.)
2. Remove the front bumper. (See FRONT BUMPER REMOVAL.) (See FRONT BUMPER INSTALLATION.)
3. Remove in the order shown in the figure.
4. Install in the reverse order of removal.
ac9uuw00009373
|
|
1
|
Charge air cooler outlet pipe
|
|
2
|
Charge air cooler inlet pipe
|
|
3
|
Charge air cooler
|
|
4
|
Protector (if equipped)
|
Charge Air Cooler Removal Note
1. Disconnect the boost pressure sensor/boost air temperature sensor connector. (See BOOST PRESSURE SENSOR/BOOST AIR TEMPERATURE SENSOR REMOVAL/INSTALLATION [SKYACTIV-G 2.5T].)
2. Remove the charge air cooler.
3. Remove the boost pressure sensor/boost air temperature sensor. (See BOOST PRESSURE SENSOR/BOOST AIR TEMPERATURE SENSOR REMOVAL/INSTALLATION [SKYACTIV-G 2.5T].)
Charge Air Cooler Installation Note
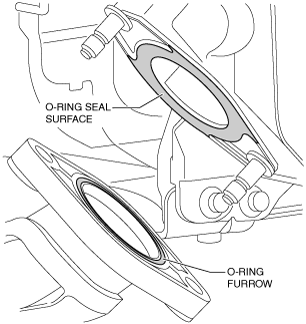
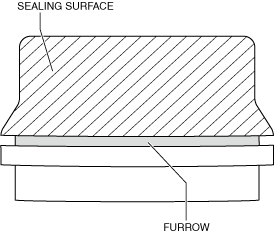
1. Remove foreign matter on the O-ring seal surface of charge air cooler and in the pipe furrow O-ring (sand or dust).
ac5wzw00006729
|
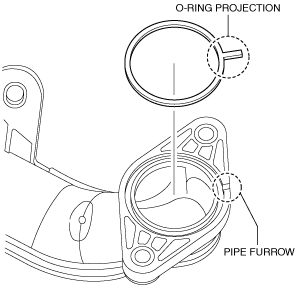
2. Align the O-ring projection with the pipe furrow and install the O-ring.
ac5wzw00006730
|
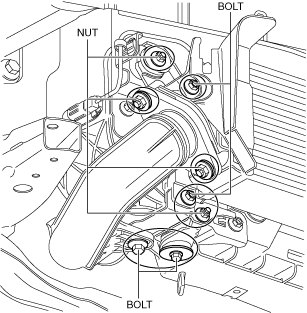
3. Temporarily install the bolts and nuts shown in the figure.
ac9wzw00005526
|
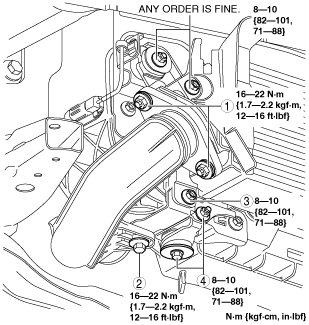
4. Tighten the charge air cooler in the order shown in the figure.
ac5wzw00005697
|
Charge Air Cooler Inlet Pipe Installation Note
1. Clean the seal surface and furrow area of the charge air cooler air inlet pipe.
ac5wzw00006724
|
2. Degrease the seal surface of the pipe, and verify if there is foreign matter penetration or scratches.
3. Apply engine oil to the seal surface of the pipe.
ac9uuw00009378
|
4. Align the pipe rib and connector groove positions, and install.
ac5wzw00006726
|
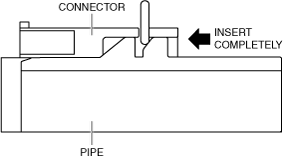
5. Insert the pipe connector completely into the connector.
ac5wzw00006727
|
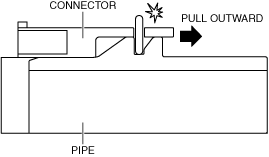
6. Pull the pipe outward and verify that a click sound is heard.
ac5wzw00006728
|