 |
ac9uuw00006091
REAR WINDOW GLASS INSTALLATION
id091200000800
1. Remove sealant along the perimeter of the glass using a utility knife or scraper. (When reusing the glass)
2. Clean and degrease an approx.50 mm {2.0 in} wide strip along the perimeter of the glass.
3. Inspect the glass for cracks. If it is cracked, chamfer it using sandpaper.
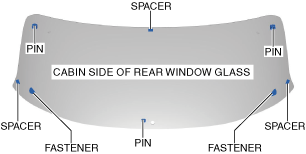
4. Install spacer, fasteners and pins to the glass as shown in the figure.(When reusing the glass)
ac9uuw00006091
|
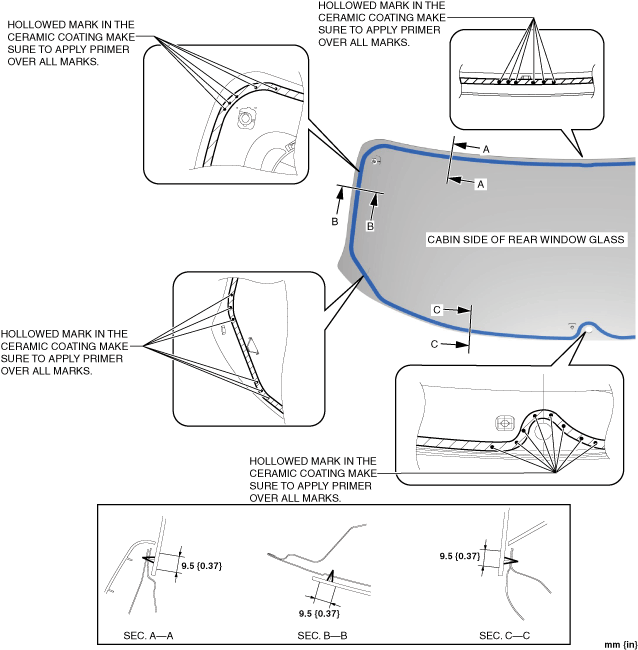
5. Apply primer to the area of the glass shown in the figure.
ac9wzw00004858
|
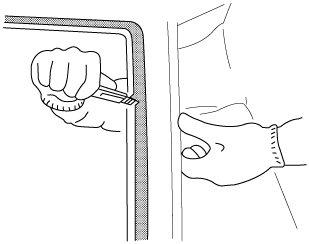
6. Cut away the old sealant using a utility knife or scraper so that 1—2 mm {0.04—0.07 in} thickness of sealant remains along the perimeter of the frame.
aaxjjw00014553
|
7. Clean and degrease along the perimeter of the bonding area on the body.
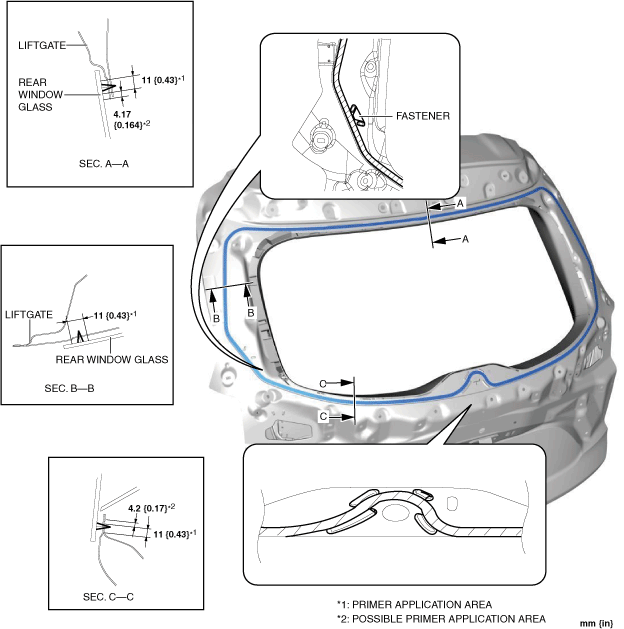
8. Apply primer to the area of the body shown in the figure.
ac9wzw00004859
|
9. Install the fastener.
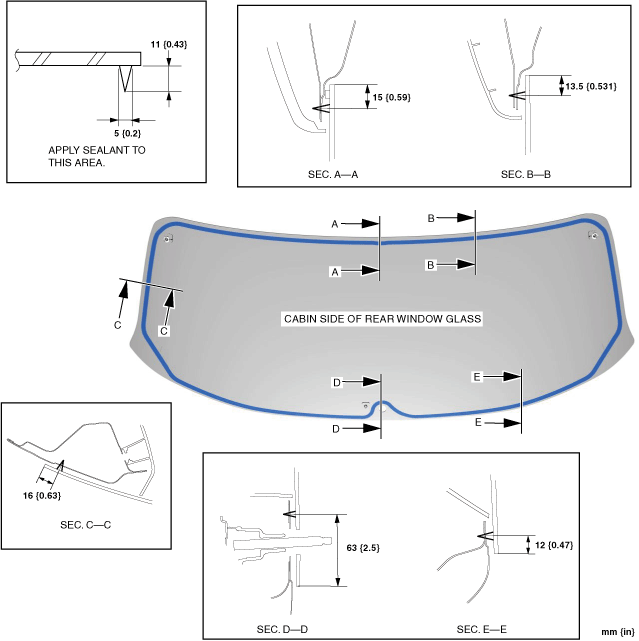
10. Apply sealant to the area of the glass surface as shown in the figure.
ac9wzw00004860
|
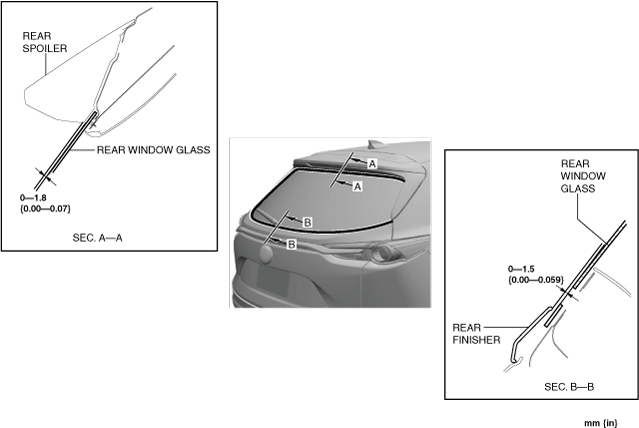
11. Install the rear window glass.
12. Verify that the gap at the upper and lower parts of the glass is within the specification shown in the figure, then press along the perimeter of the glass.
ac9wzw00004861
|
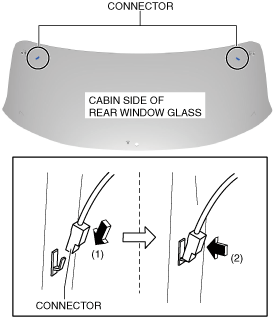
13. Connect the connectors in the direction of the arrow in the order of (1), (2) shown in the figure.
ac9wzw00004862
|
14. Install the glass antenna terminal cover in the direction of the arrow shown in the figure. (with DAB antenna amplifier)
ac9wzw00005331
|
15. Install the following parts:
16. Connect the negative battery terminal. (See NEGATIVE BATTERY TERMINAL DISCONNECTION/CONNECTION.)
17. Allow the sealant to harden completely.
18. Perform rear window defogger inspection. (See REAR WINDOW DEFOGGER INSPECTION.)