|
ac9wzw00004905
METER HOOD REMOVAL/INSTALLATION
id091700600600
Meter Hood No.1
1. Disconnect the negative battery terminal. (See NEGATIVE BATTERY TERMINAL DISCONNECTION/CONNECTION.)
2. Remove the following parts:
3. With the fastener base held by a finger, rotate the fastener axle counterclockwise and pull out it using a flathead screwdriver.
ac9wzw00004905
|
ac9wzw00004906
|
4. After creating clearance between the fastener base and the axle for inserting the flathead screwdriver, insert the flathead screwdriver into the base and the axle, pull out the axle while moving the flathead screwdriver in the direction of the arrow shown in the figure, and remove the fasteners.
ac9wzw00003566
|
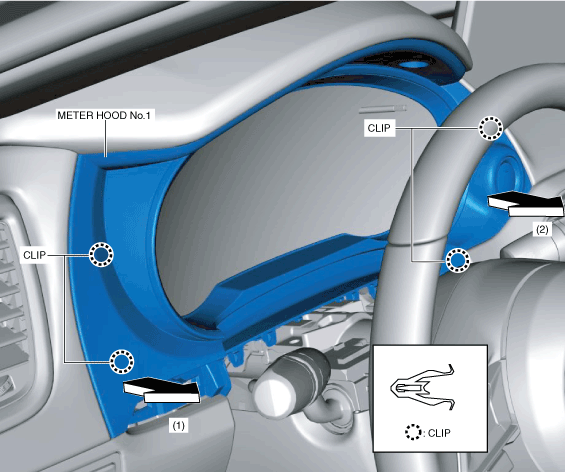
5. Remove the meter hood No.1 in the direction of the arrow in the order of (1), (2) while detaching the clips.
ac9wzw00003567
|
6. Disconnect the start switch connector.
7. Install in the reverse order of removal.
Meter Hood No.2
1. Disconnect the negative battery terminal. (See NEGATIVE BATTERY TERMINAL DISCONNECTION/CONNECTION.)
2. Remove the following parts:
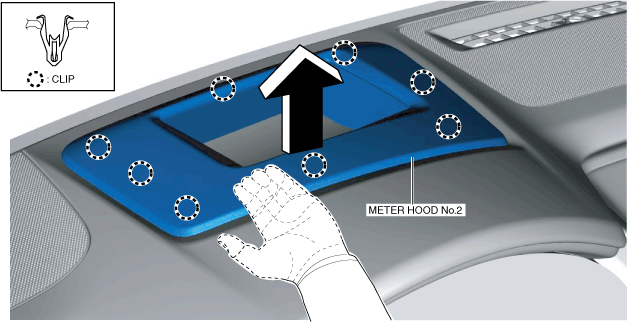
3. Insert your hand from the instrument cluster installation area, press the meter hood No.2 in the direction of the arrow shown in the figure, and detach the clips from the instrument cluster.
ac9wzw00004907
|
4. Remove the meter hood No.2.
5. Install in the reverse order of removal.