 |
ac9uuw00009780
FRONT CONSOLE REMOVAL/INSTALLATION
id091700601900
1. Disconnect the negative battery terminal. (See NEGATIVE BATTERY TERMINAL DISCONNECTION/CONNECTION.)
2. Remove the following parts:
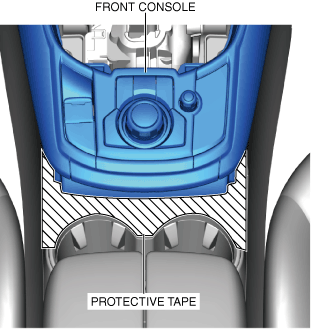
3. To prevent scratches or damage, affix protective tape to the position shown in the figure.
ac9uuw00009780
|
ac9uuw00009781
|
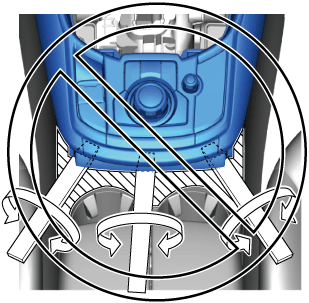
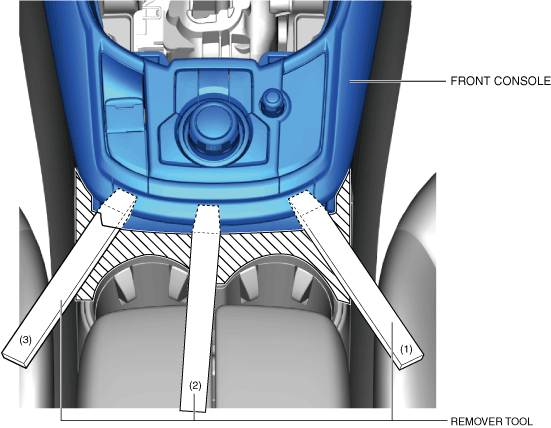
4. Insert the remover tools in the order shown in the figure.
ac9wzw00005380
|
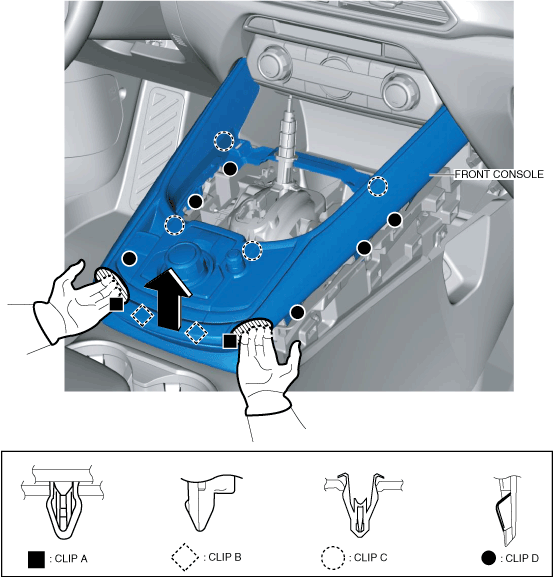
5. Put on non-slip gloves.
6. Hold the shaded area with both hands, move the front console in the direction of the arrow shown in the figure, and detach clips A, B, C and D from the front console.
ac9uuw00008560
|
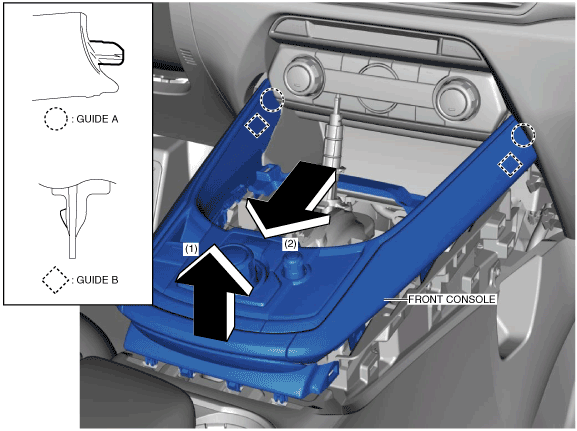
7. Remove the front console in the order of arrows (1), (2) shown in the figure while detaching guides A, B.
ac9uuw00005632
|
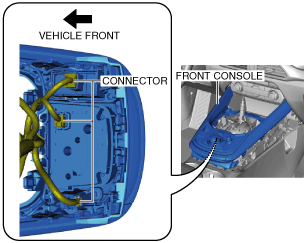
8. Disconnect the connectors.
ac9uuw00005633
|
9. Remove the front console.
10. Install in the reverse order of removal.