 |
ac9wzw00003413
FRONT COMBINATION LIGHT REMOVAL/INSTALLATION
id091800800700
1. Disconnect the negative battery terminal. (See NEGATIVE BATTERY TERMINAL DISCONNECTION/CONNECTION.)
2. Remove the seal board upper. (See SEAL BOARD UPPER REMOVAL/INSTALLATION.)
3. Remove the front bumper. (See FRONT BUMPER REMOVAL.) (See FRONT BUMPER INSTALLATION.)
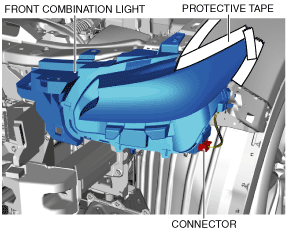
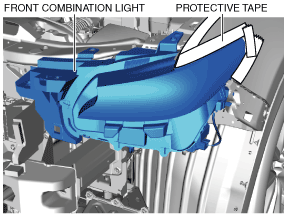
4. To prevent scratches or damage, affix protective tape to the position shown in the figure.
ac9wzw00003413
|
5. Disconnect the connector.
ac9wzw00003414
|
6. Remove the bolts in the order of (1), (2) and (3).
ac9uuw00007138
|
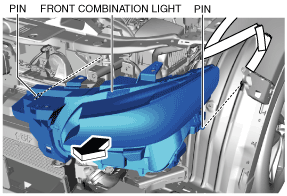
7. Remove the fastener.
8. Pull the front combination light in the direction of the arrow shown in the figure and remove the front combination light.
ac9uuw00007139
|
9. Install in the reverse order of removal.
10. Adjust the headlight aiming. (See HEADLIGHT AIMING.)