 |
ac9wzw00003823
DC-DC CONVERTER (i-ELOOP) REMOVAL/INSTALLATION [i-ELOOP]
id131704009000
Procedure Before i-ELOOP-Related Part Servicing
DC-DC Converter (i-ELOOP) Removal/Installation
1. Disconnect the negative battery terminal. (See NEGATIVE BATTERY TERMINAL DISCONNECTION/CONNECTION.)
2. Disconnect the service plug. (See SERVICE PLUG DISCONNECTION/CONNECTION [i-ELOOP].)
3. Remove the terminal cover. (See BATTERY REMOVAL/INSTALLATION.)
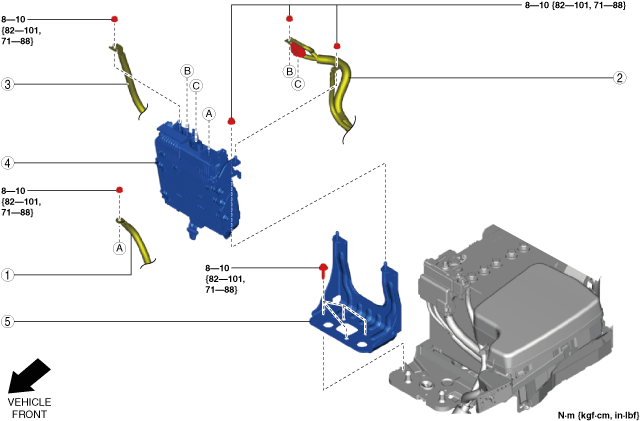
4. Remove in the order indicated in the table.
5. Install in the reverse order of removal.
6. If the DC-DC converter (i-ELOOP) is replaced with a new one, verify if the capacitor voltage (PID: CAP_V) is more than the minimum value using the M-MDS data monitor function.
ac9wzw00003823
|
|
1
|
Battery cable
|
|
2
|
DC-DC converter (i-ELOOP) connector, front wiring harness
|
|
3
|
Short-cord
|
|
4
|
DC-DC converter (i-ELOOP)
|
|
5
|
Bracket
(See Bracket removal note.)
(See Bracket installation note.)
|
Bracket removal note
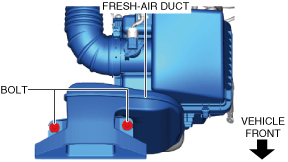
1. Remove the fresh-air duct bolts.
ac9wzw00003824
|
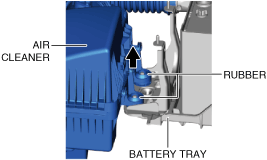
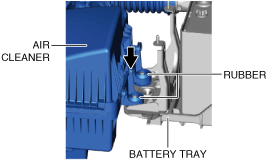
2. Remove the rubber at the two locations on the air cleaner component from the battery tray.
ac9wzw00003825
|
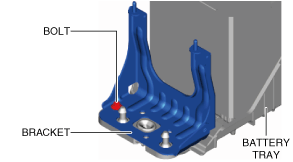
3. Remove the bracket.
Bracket installation note
1. Set the bracket to the installation position.
2. Temporarily tighten the bolt shown in the figure.
ac9wzw00003826
|
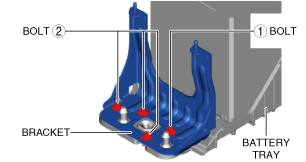
3. Tighten the bolts in the order shown in the figure.
ac9wzw00003827
|
4. Install the rubber at the two locations on the air cleaner component to the battery tray.
ac9wzw00003828
|
5. Tighten the fresh-air duct bolts.
ac9wzw00003824
|
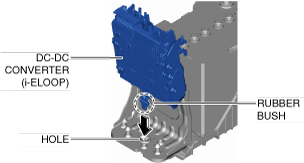
DC-DC converter (i-ELOOP) installation note
1. While inserting the rubber bush of the DC-DC converter (i-ELOOP), set the DC-DC converter (i-ELOOP) to the installation position.
ac9wzw00003829
|
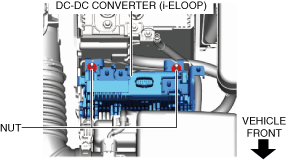
2. Tighten the nuts shown in the figure.
ac9wzw00003830
|