|
ac9wzw00004362
FUEL GAUGE SENDER UNIT REMOVAL/INSTALLATION [4WD]
id0922000120b3
Fuel Gauge Sender Unit (Main)
Fuel Gauge Sender Unit (Sub)
1. Complete the “BEFORE SERVICE PRECAUTION”. (See BEFORE SERVICE PRECAUTION [SKYACTIV-G 2.5T].)
2. Refer to the “FUEL DRAINING PROCEDURE” and drain the fuel. (See FUEL DRAINING PROCEDURE [SKYACTIV-G 2.5T].)
3. Disconnect the negative battery terminal. (See NEGATIVE BATTERY TERMINAL DISCONNECTION/CONNECTION.)
4. Remove the second-row seat (RH). (See SECOND-ROW SEAT REMOVAL/INSTALLATION.)
5. Cut the floor covering along the dotted lines shown in the figure and partially peel it back.
ac9wzw00004362
|
6. Remove the screws.
ac9uuw00006744
|
7. Remove the service hole cover.
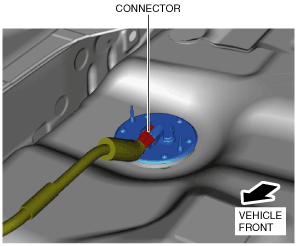
8. Disconnect the connector.
ac9uuw00006745
|
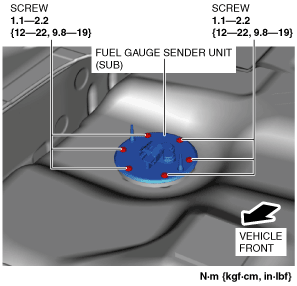
9. Remove the screws.
ac9wzw00004363
|
10. Remove the fuel gauge sender unit (sub).
ac9uuw00006747
|
11. Install in the reverse order of removal.
12. Perform the fuel leakage inspection referring to “AFTER SERVICE PRECAUTION”. (See AFTER SERVICE PRECAUTION [SKYACTIV-G 2.5T].)