 |
ac9wzw00003603
FRONT EXPANSION VALVE REMOVAL/INSTALLATION
id071100802200
L.H.D.
1. Disconnect the negative battery terminal. (See NEGATIVE BATTERY TERMINAL DISCONNECTION/CONNECTION.)
2. Discharge the refrigerant. (See REFRIGERANT RECOVERY.)(See REFRIGERANT CHARGING.)
3. Remove the following parts:
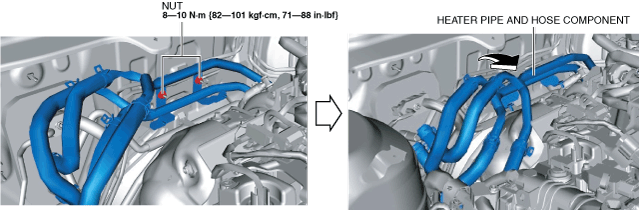
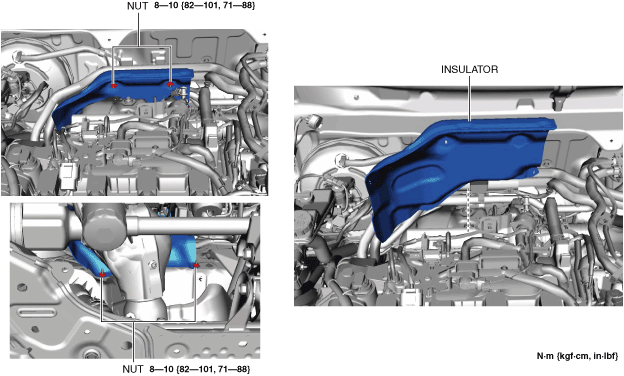
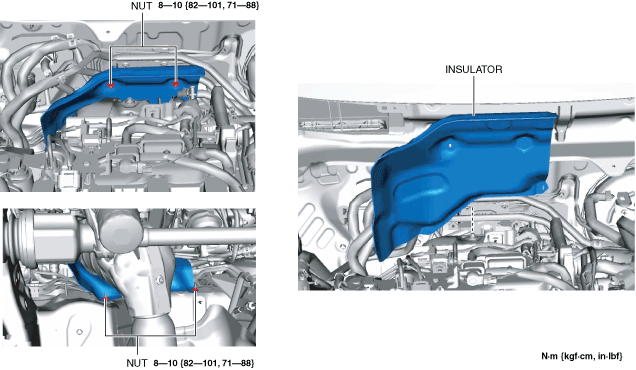
4. Remove the nuts.
ac9wzw00003603
|
5. Remove the insulator.
6. Remove the nuts.
ac9wzw00003604
|
7. Set the heater pipe and hose component out of the way as shown in the figure.
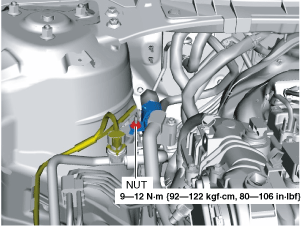
8. Remove the nut.
ac9uuw00007609
|
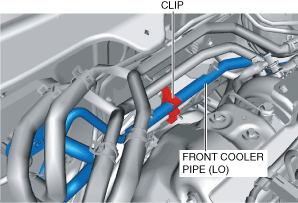
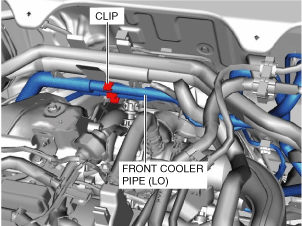
9. Remove the front cooler pipe (LO) from the clip.
ac9wzw00003606
|
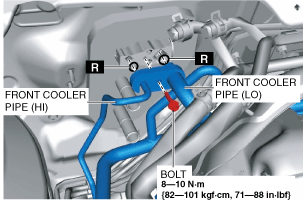
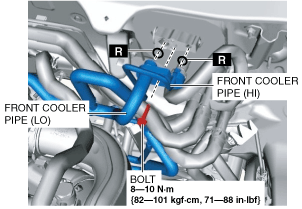
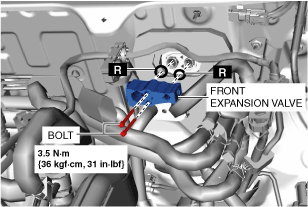
10. Remove the bolt.
ac9wzw00003605
|
11. Disconnect the front cooler pipe (HI) and front cooler pipe (LO). Do not allow compressor oil to spill.
12. Set the front cooler pipe (HI) and front cooler pipe (LO) out of the way.
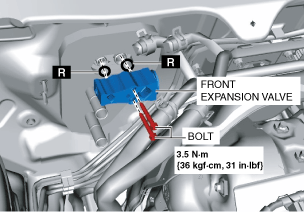
13. Remove the bolts.
ac9uuw00007611
|
14. Remove the front expansion valve. Do not allow compressor oil to spill.
15. Install in the reverse order of removal. (See Front expansion valve installation note.)
16. Perform the refrigerant system performance test. (See REFRIGERANT SYSTEM PERFORMANCE TEST.)
Front expansion valve installation note
1. Apply compressor oil to the O-rings and connect the joints.
R.H.D.
1. Disconnect the negative battery terminal. (See NEGATIVE BATTERY TERMINAL DISCONNECTION/CONNECTION.)
2. Discharge the refrigerant. (See REFRIGERANT RECOVERY.)(See REFRIGERANT CHARGING.)
3. Remove the following parts:
4. Remove the nuts.
ac9wzw00003607
|
5. Remove the insulator.
6. Remove the front cooler pipe (LO) from the clip.
ac9wzw00003609
|
7. Remove the bolt.
ac9wzw00003608
|
8. Disconnect the front cooler pipe (HI) and front cooler pipe (LO). Do not allow compressor oil to spill.
9. Set the front cooler pipe (HI) and front cooler pipe (LO) out of the way.
10. Remove the bolts.
ac9wzw00003610
|
11. Remove the front expansion valve. Do not allow compressor oil to spill.
12. Install in the reverse order of removal. (See Front expansion valve installation note.)
13. Perform the refrigerant system performance test. (See REFRIGERANT SYSTEM PERFORMANCE TEST.)
Front expansion valve installation note
1. Apply compressor oil to the O-rings and connect the joints.