 |
ac9uuw00005839
FRONT FENDER PANEL REMOVAL/INSTALLATION
id091000801000
1. Disconnect the negative battery terminal. (See NEGATIVE BATTERY TERMINAL DISCONNECTION/CONNECTION.)
2. Remove the following parts:
3. Open the front door.
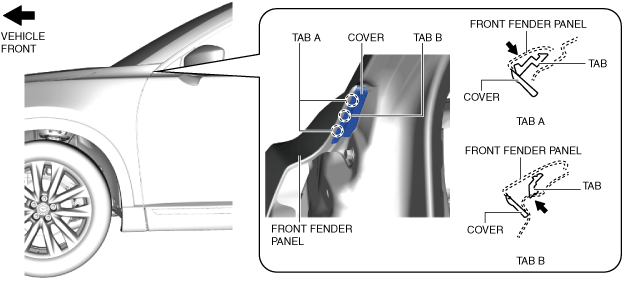
4. Press the cover tabs A and tab B in the direction of the arrow shown in the figure and detach the cover from the front fender panel.
ac9uuw00005839
|
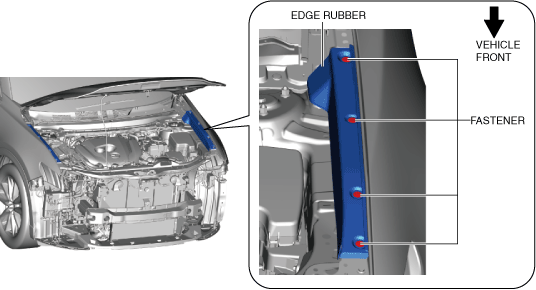
5. Remove the cover.
6. Remove the fasteners.
ac9uuw00005840
|
7. Remove the edge rubber.
8. Affix the protective tape to the position shown in the figure to prevent scratches and damage.
ac9uuw00005841
|
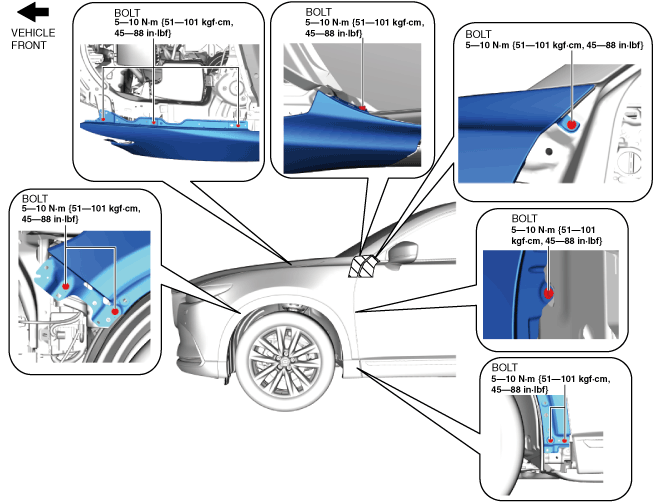
9. Remove the bolts.
ac9wzw00005248
|
10. Remove the front fender panel.
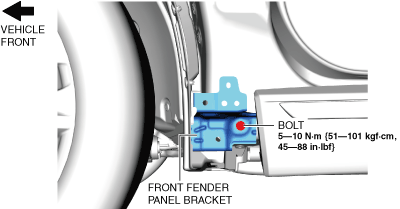
11. Remove the bolt.
ac9uuw00005843
|
12. Remove the front fender panel bracket.
13. Install in the reverse order of removal.