REQUEST SWITCH REMOVAL/INSTALLATION
id091400515200
Driver's Door/Passenger's Door
-
Note
-
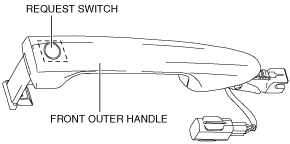
• The request switch cannot be removed as a single unit because it is built into the front outer handle. If the request switch is replaced, replace the front outer handle. (See
FRONT OUTER HANDLE REMOVAL/INSTALLATION.)
Liftgate
1. Disconnect the negative battery terminal. (See NEGATIVE BATTERY TERMINAL DISCONNECTION/CONNECTION.)
2. Remove the following parts:
- (1) Liftgate upper trim (See LIFTGATE UPPER TRIM REMOVAL/INSTALLATION.)
-
- (2) Liftgate side trim (See LIFTGATE SIDE TRIM REMOVAL/INSTALLATION.)
-
- (3) Liftgate recess cover (See LIFTGATE RECESS REMOVAL/INSTALLATION.)
-
- (4) Power liftgate (PLG) rear switch (with power liftgate) (See POWER LIFTGATE (PLG) REAR SWITCH REMOVAL/INSTALLATION.)
-
- (5) Liftgate lower trim (See LIFTGATE LOWER TRIM REMOVAL/INSTALLATION.)
-
- (6) Liftgate garnish (See LIFTGATE GARNISH REMOVAL/INSTALLATION.)
-
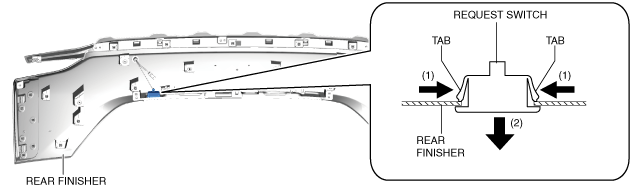
- (7) Rear finisher (See REAR FINISHER REMOVAL.) (See REAR FINISHER INSTALLATION.)
-
3. Push out the request switch in the direction of the arrow (2) shown in the figure while pressing the request switch tab in the direction of the arrow (1) shown in the figure, detach the request switch tab and rear finisher, and then remove the request switch from the rear finisher.
4. Install in the reverse order of removal.