ac9wzw00003594
|
REAR A/C UNIT REMOVAL/INSTALLATION
id071100802000
1. Disconnect the negative battery terminal. (See NEGATIVE BATTERY TERMINAL DISCONNECTION/CONNECTION.)
2. Discharge the refrigerant. (See REFRIGERANT RECOVERY.)(See REFRIGERANT CHARGING.)
3. Drain the engine coolant. (See ENGINE COOLANT REPLACEMENT [SKYACTIV-G 2.5T].)
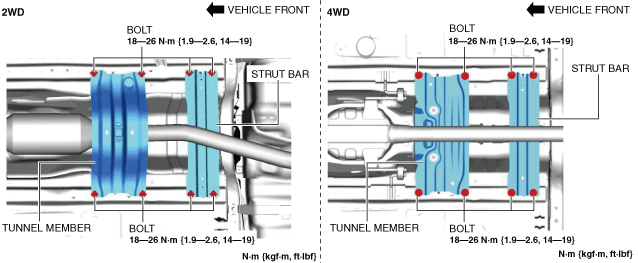
4. Remove the following parts:
ac9wzw00003594
|
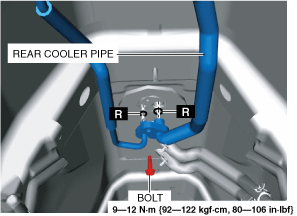
5. Remove the bolt.
ac9uuw00007537
|
6. Disconnect the rear cooler pipe. Do not allow compressor oil to spill.
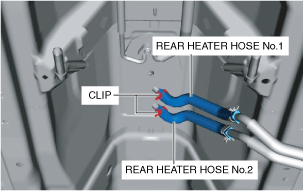
7. Disconnect the rear heater hose No.1.
ac9uuw00007538
|
8. Disconnect the rear heater hose No.2.
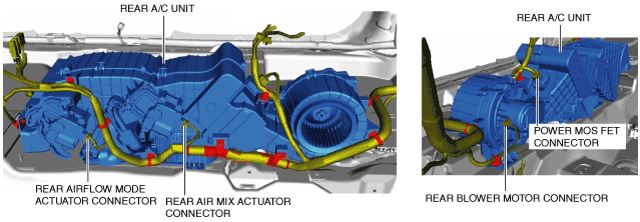
9. Disconnect the rear blower motor connector.
ac9uuw00007539
|
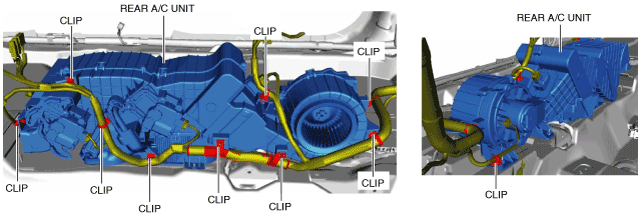
10. Disconnect the power MOS FET connector.
11. Disconnect the rear airflow mode actuator connector.
12. Disconnect the rear air mix actuator connector.
13. Detach the clips.
ac9uuw00007540
|
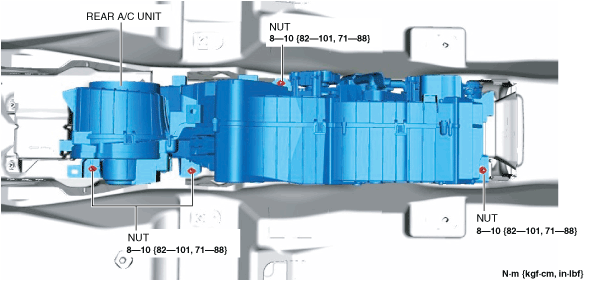
14. Remove the nuts.
ac9uuw00007541
|
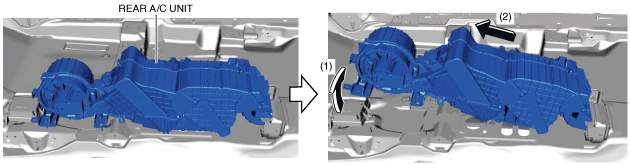
15. Move the rear A/C unit in the order of arrows (1) and (2) shown in the figure, and remove the rear A/C unit. Do not allow compressor oil to spill.
ac9uuw00007542
|
ac9uuw00007543
|
16. Install in the reverse order of removal. (See Rear A/C Unit Installation Note (1).)(See Rear A/C Unit Installation Note (2).)
17. Inspect for engine coolant leakage. (See ENGINE COOLANT LEAKAGE INSPECTION [SKYACTIV-G 2.5T].)
18. Perform the refrigerant system performance test. (See REFRIGERANT SYSTEM PERFORMANCE TEST.)
Rear A/C Unit Installation Note (1)
1. Apply compressor oil to the O-rings and connect the joints.
Rear A/C Unit Installation Note (2)
1. When replacing the rear A/C unit or rear evaporator, add compressor oil to the refrigerant cycle.