FUEL-FILLER LID OPENER CABLE REMOVAL/INSTALLATION
id091400510800
L.H.D.
1. Disconnect the negative battery terminal. (See NEGATIVE BATTERY TERMINAL DISCONNECTION/CONNECTION.)
2. Remove the following parts:
- (1) Front scuff plate (LH) (See FRONT SCUFF PLATE REMOVAL/INSTALLATION.)
-
- (2) Front side trim (LH) (See FRONT SIDE TRIM REMOVAL/INSTALLATION.)
-
- (3) Rear scuff plate (LH) (See REAR SCUFF PLATE REMOVAL/INSTALLATION.)
-
- (4) B-pillar lower trim (LH) (See B-PILLAR LOWER TRIM REMOVAL/INSTALLATION.)
-
- (5) Lower anchor cover of the front seat belt (LH) (See FRONT SEAT BELT REMOVAL/INSTALLATION.)
-
- (6) Lower anchor bolt of the front seat belt (LH) (See FRONT SEAT BELT REMOVAL/INSTALLATION.)
-
- (7) Trunk covering (See TRUNK COVERING REMOVAL/INSTALLATION.)
-
- (8) Trunk board (See TRUNK BOARD REMOVAL/INSTALLATION.)
-
- (9) Trunk side pocket (LH) (See TRUNK SIDE POCKET REMOVAL/INSTALLATION.)
-
- (10) Trunk end trim (See TRUNK END TRIM REMOVAL/INSTALLATION.)
-
- (11) Third-row seat cushion (See THIRD-ROW SEAT CUSHION REMOVAL/INSTALLATION.)
-
- (12) Third-row seat back component (See THIRD-ROW SEAT BACK COMPONENT REMOVAL/INSTALLATION.)
-
- (13) Trunk side trim (LH) (See TRUNK SIDE TRIM REMOVAL/INSTALLATION.)
-
- (14) Fuel-filler lid opener lever (See FUEL-FILLER LID OPENER AND LEVER REMOVAL/INSTALLATION.)
-
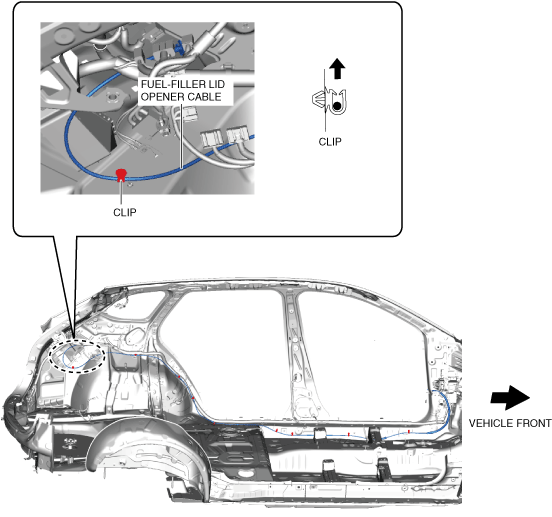
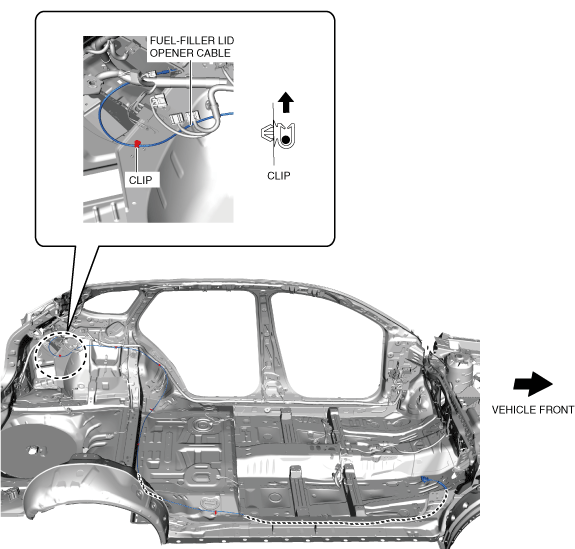
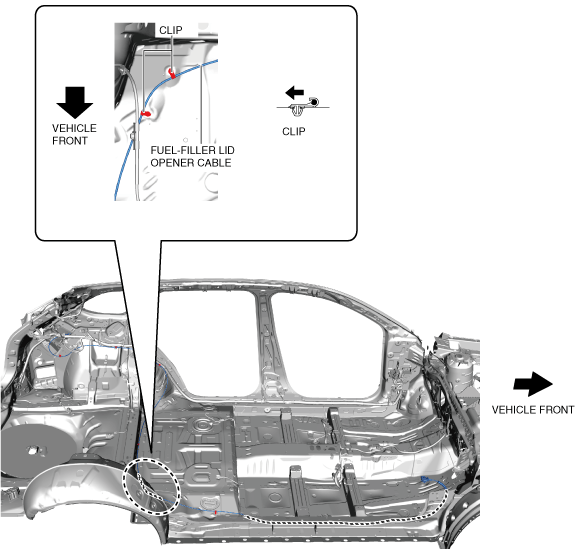
3. Remove the fuel-filler lid opener cable from the clip.
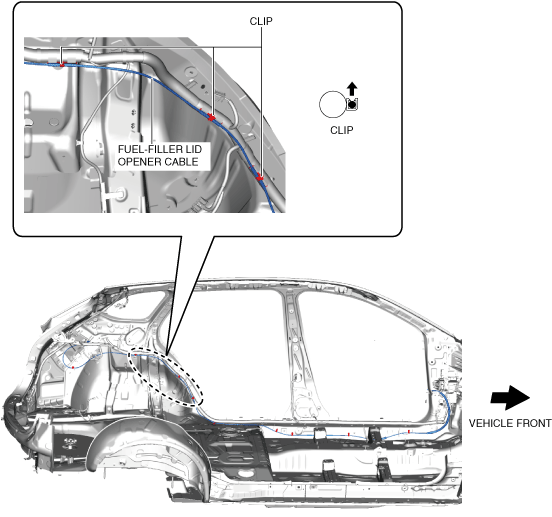
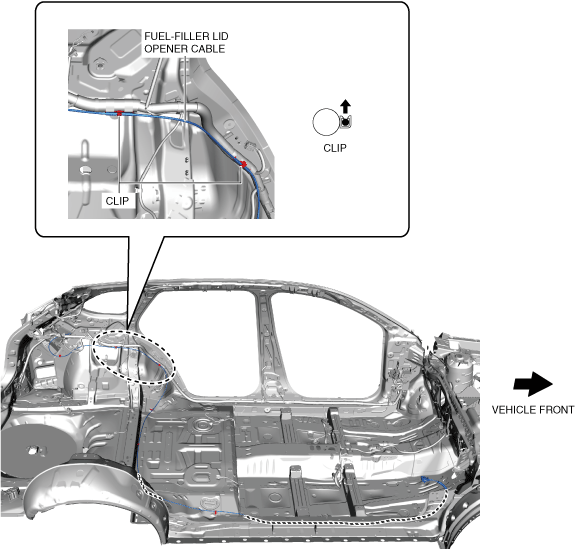
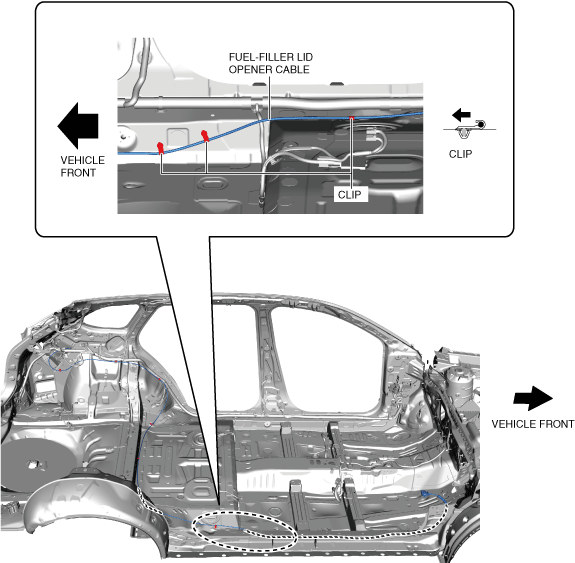
4. Remove the fuel-filler lid opener cable from the clips.
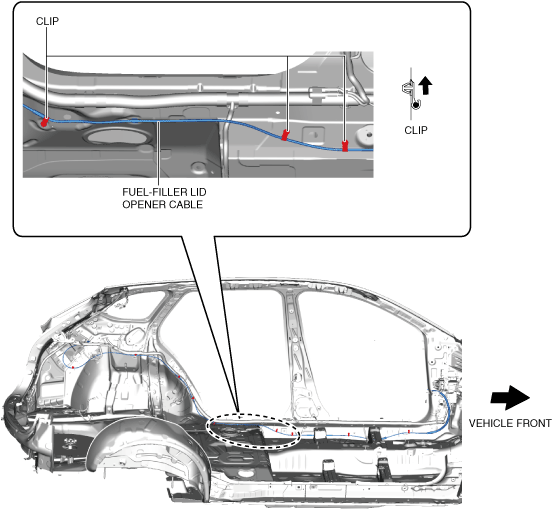
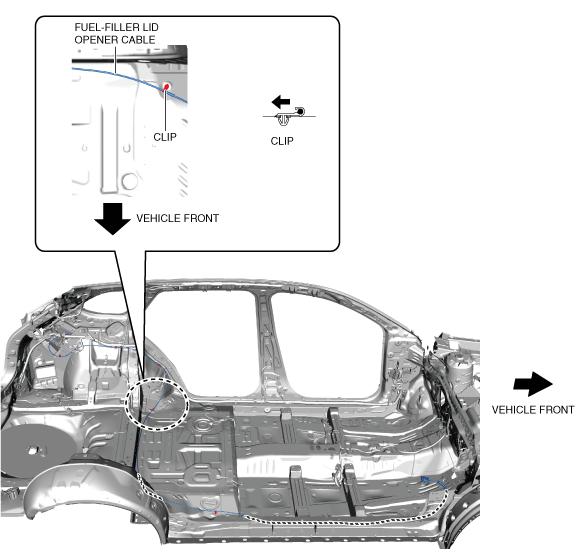
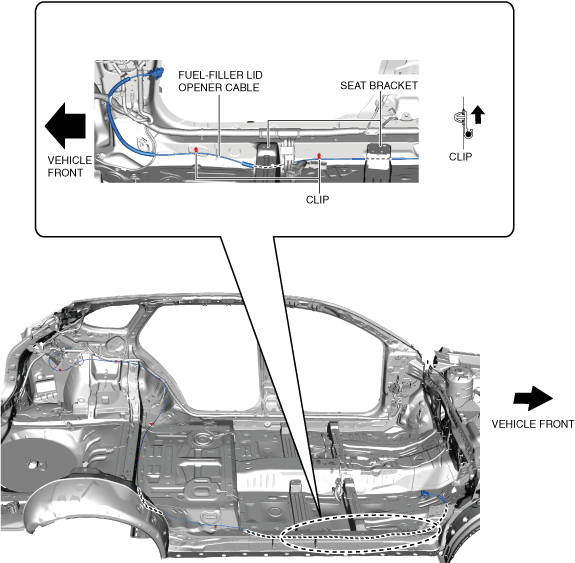
5. Peel back the floor mat and remove the fuel-filler lid opener cable from the clips shown in the figure.
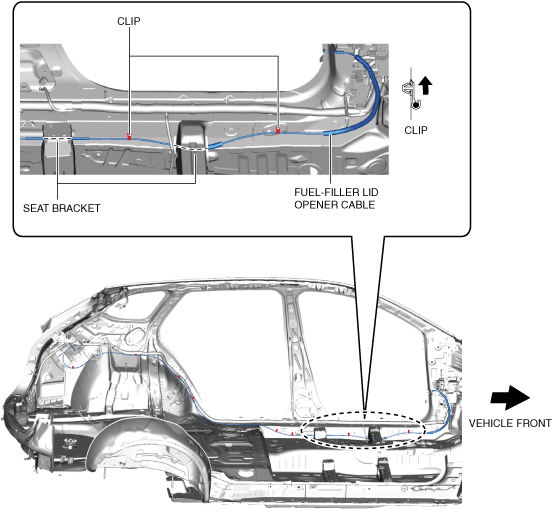
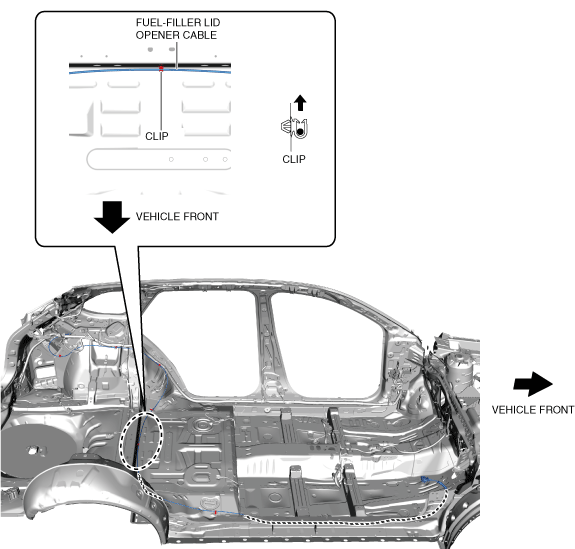
6. Peel back the floor mat and remove the fuel-filler lid opener cable from the clips shown in the figure.
7. Pull out the fuel-filler lid opener cable out from the seat brackets.
8. Install in the reverse order of removal.
R.H.D.
1. Disconnect the negative battery terminal. (See NEGATIVE BATTERY TERMINAL DISCONNECTION/CONNECTION.)
2. Remove the following parts:
- (1) Front scuff plate (RH) (See FRONT SCUFF PLATE REMOVAL/INSTALLATION.)
-
- (2) Front side trim (RH) (See FRONT SIDE TRIM REMOVAL/INSTALLATION.)
-
- (3) Rear scuff plate (See REAR SCUFF PLATE REMOVAL/INSTALLATION.)
-
- (4) B-pillar lower trim (RH) (See B-PILLAR LOWER TRIM REMOVAL/INSTALLATION.)
-
- (5) Lower anchor cover of the front seat belt (LH) (See FRONT SEAT BELT REMOVAL/INSTALLATION.)
-
- (6) Lower anchor bolt of the front seat belt (LH) (See FRONT SEAT BELT REMOVAL/INSTALLATION.)
-
- (7) Trunk covering (See TRUNK COVERING REMOVAL/INSTALLATION.)
-
- (8) Trunk board (See TRUNK BOARD REMOVAL/INSTALLATION.)
-
- (9) Trunk side pocket (See TRUNK SIDE POCKET REMOVAL/INSTALLATION.)
-
- (10) Trunk end trim (See TRUNK END TRIM REMOVAL/INSTALLATION.)
-
- (11) Third-row seat cushion (See THIRD-ROW SEAT CUSHION REMOVAL/INSTALLATION.)
-
- (12) Third-row seat back component (See THIRD-ROW SEAT BACK COMPONENT REMOVAL/INSTALLATION.)
-
- (13) Trunk side trim (See TRUNK SIDE TRIM REMOVAL/INSTALLATION.)
-
- (14) Fuel-filler lid opener lever (See FUEL-FILLER LID OPENER AND LEVER REMOVAL/INSTALLATION.)
-
3. Remove the fuel-filler lid opener cable from the clip.
4. Remove the fuel-filler lid opener cable from the clips.
5. Peel back the floor mat and remove the fuel-filler lid opener cable from the clip shown in the figure.
6. Peel back the floor mat and remove the fuel-filler lid opener cable from the clip shown in the figure.
7. Peel back the floor mat and remove the fuel-filler lid opener cable from the clips shown in the figure.
8. Peel back the floor mat and remove the fuel-filler lid opener cable from the clips shown in the figure.
9. Peel back the floor mat and remove the fuel-filler lid opener cable from the clips shown in the figure.
10. Pull out the fuel-filler lid opener cable out from the seat brackets.
11. Install in the reverse order of removal.