 |
ac9wzw00005281
360°VIEW MONITOR CONTROL MODULE REMOVAL/INSTALLATION
id152000010000
1. Disconnect the negative battery terminal. (See NEGATIVE BATTERY TERMINAL DISCONNECTION/CONNECTION.)
2. Remove the following parts.
3. Partially peel back the floor covering.
4. Remove the foot support. (See FOOT SUPPORT REMOVAL/INSTALLATION.)
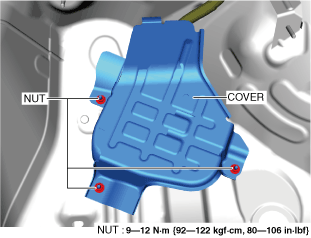
5. Remove the nuts.
ac9wzw00005281
|
6. Remove the cover.
7. Disconnect the connector.
ac9wzw00005282
|
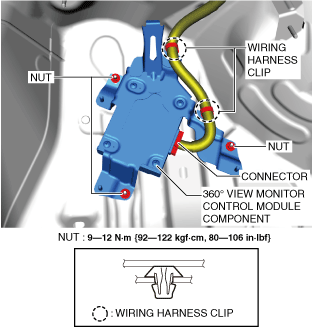
8. Remove the wiring harness clips.
9. Remove the nuts.
10. Remove the 360° view monitor control module component.
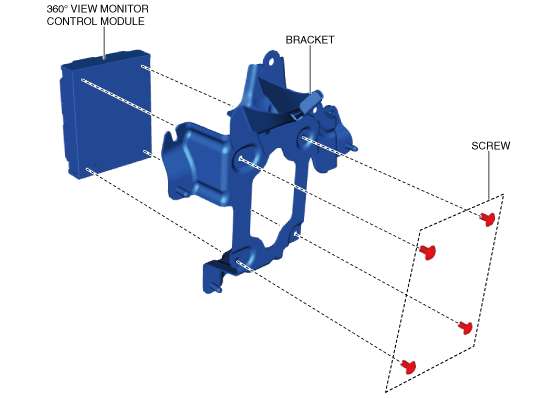
11. Remove the screws.
ac9wzw00005283
|
12. Remove the 360° view monitor control module from the bracket.
13. Install in the reverse order of removal.
14. If the 360° view monitor control module is replaced, perform the 360° view monitor system aiming. (See 360°VIEW MONITOR SYSTEM AIMING.)