FRONT BUMPER REINFORCEMENT REMOVAL/INSTALLATION


id091000800600

1.  Disconnect the negative battery terminal. (See NEGATIVE BATTERY TERMINAL DISCONNECTION/CONNECTION.)

2.  Remove the following parts:

(1)  Front under cover No.1 (See FRONT UNDER COVER No.1 REMOVAL/INSTALLATION.)
(2)  Seal board upper (See SEAL BOARD UPPER REMOVAL/INSTALLATION.)
(3)  Front bumper (See FRONT BUMPER REMOVAL.) (See FRONT BUMPER INSTALLATION.)
(4)  Front combination light (See FRONT COMBINATION LIGHT REMOVAL/INSTALLATION.)
(5)  Energy-absorbing form (See ENERGY-ABSORBING FORM REMOVAL/INSTALLATION.)
(6)  Set plate (See SET PLATE REMOVAL/INSTALLATION.)
(7)  Bumper stiffener lower (See BUMPER STIFFENER LOWER REMOVAL/INSTALLATION.)

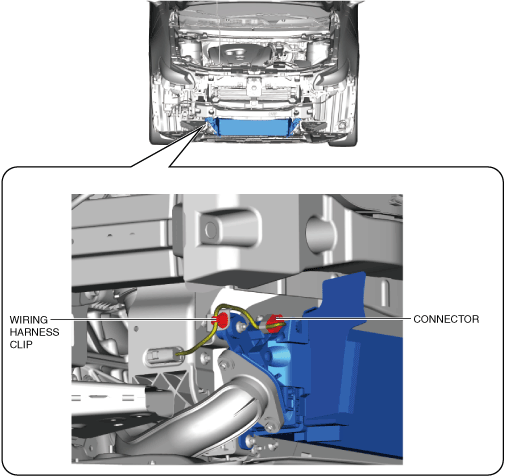
3.  Remove the wiring harness clip.

ac9uuw00005833

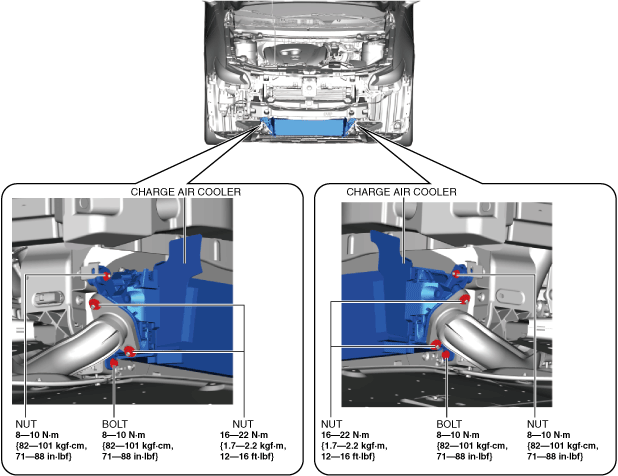
4.  Disconnect the connector.

5.  Remove the nuts and bolts.

ac9wzw00004386

6.  Remove the bolts.

ac9uuw00005832

7.  Remove the charge air cooler. (See CHARGE AIR COOLER REMOVAL/INSTALLATION [SKYACTIV-G 2.5T].)

Caution
•  When removing the front bumper reinforcement, always use a floor jack to support the shroud panel. Otherwise, the shroud panel or the radiator may fall and be damaged.
•  Insert a wood block wrapped in a rag between the floor jack and radiator to prevent scratches or damage.

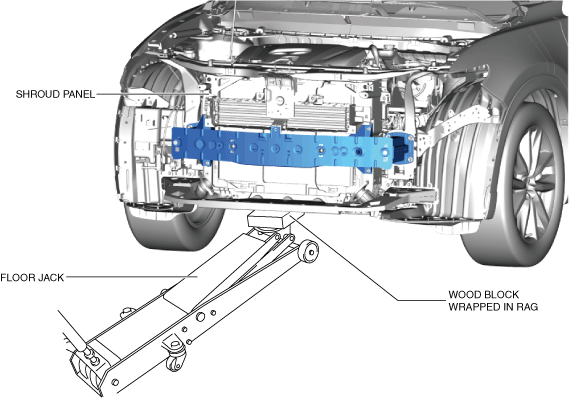
8.  Support the shroud panel using a floor jack.

ac9uuw00005834

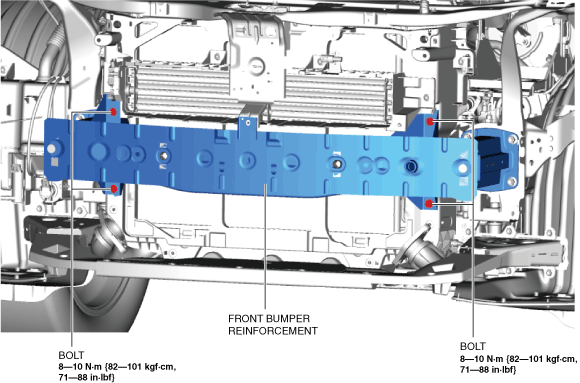
9.  Remove the bolts.

ac9uuw00005835

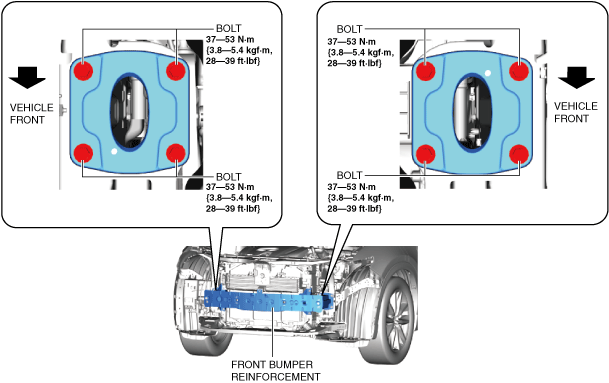
10.  Remove the bolts.

ac9wzw00005314

11.  Remove the front bumper reinforcement.

12.  Install in the reverse order of removal.

13.  Adjust the headlight aiming. (See HEADLIGHT AIMING.)