 |
ac9wzw00003907
SHROUD PANEL REMOVAL/INSTALLATION
id091000801900
1. Disconnect the negative battery terminal. (See NEGATIVE BATTERY TERMINAL DISCONNECTION/CONNECTION.)
2. Remove the following parts:
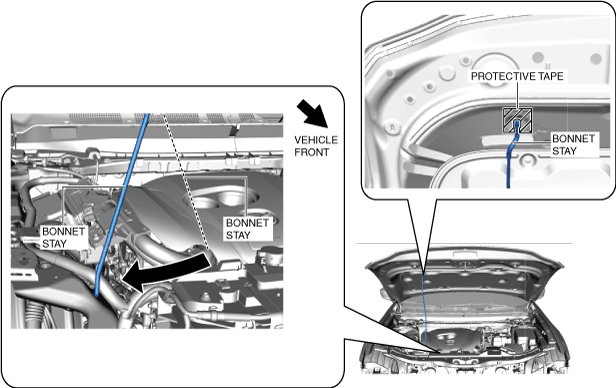
3. Affix the protective tape to the position shown in the figure to prevent scratches and damage.
ac9wzw00003907
|
4. Relocate the bonnet stay to the position shown in the figure.
5. Remove the wiring harness clips secured to the shroud panel.
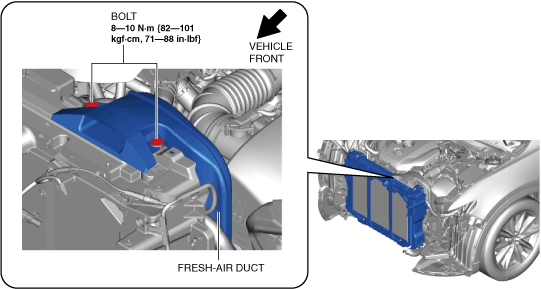
6. Remove the bolts and partially peel back fresh-air duct.
ac9uuw00005851
|
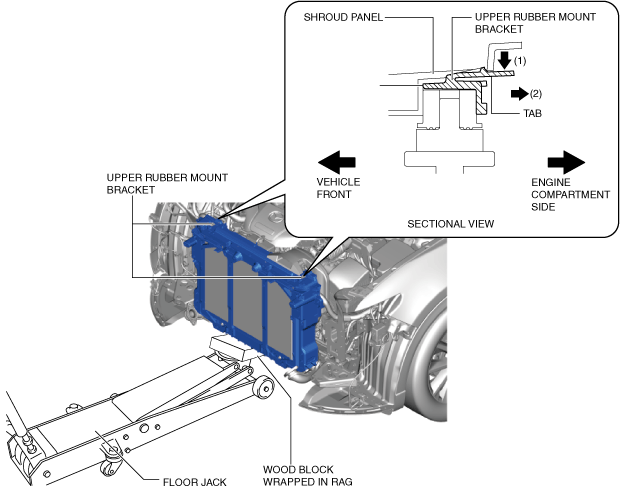
7. Press down the tabs in the direction of the arrow (1) shown in the figure, remove the upper rubber mount bracket in the direction of the arrow (2) shown in the figure.
ac9uuw00005852
|
8. Support the radiator.
9. Lower the floor jack.
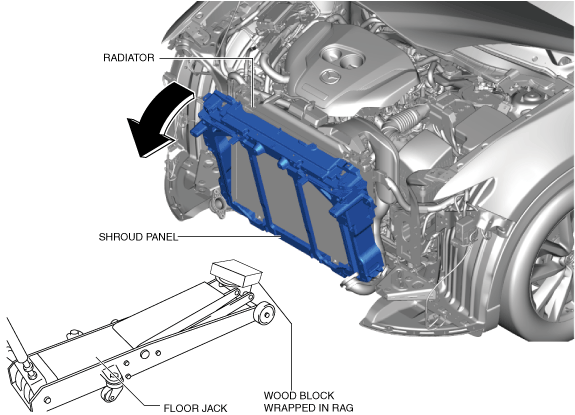
10. Tilt the shroud panel in the direction of the arrow shown in the figure while holding the upper part of the radiator.
ac9uuw00005853
|
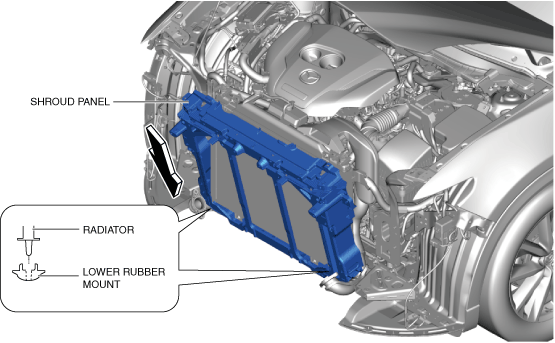
11. Move the shroud panel in the direction of the arrow shown in the figure with the upper part of the radiator held by hand, detach the radiator from the lower rubber mount.
ac9uuw00005854
|
12. Remove the shroud panel.
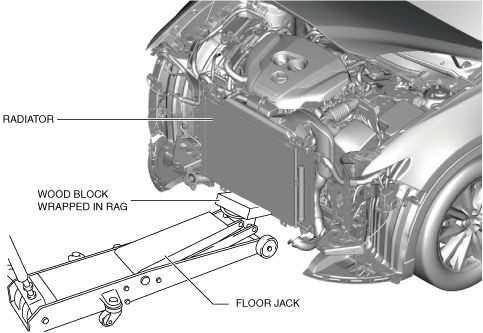
13. Insert a wood block wrapped in a rag between the floor jack and radiator to prevent scratches or damage.
ac9uuw00005855
|
14. Support the radiator using a floor jack.
15. Install in the reverse order of removal.
16. Adjust the headlight aiming. (See HEADLIGHT AIMING.)
17. If the radar unit and radar unit bracket are replaced, perform the radar unit aiming adjustment. (See RADAR UNIT AIMING.)